Moodle Help
Navigating the Glossary
At the top of the page, you’ll see several ways to browse:
-
Search Bar: A quick way to find specific terms. Enter a keyword (such as “Grades” or “Assignments”) and press Enter. This is often the quickest way to locate the information you need.
-
Categories: Select a category to see all tutorials surrounding a particular topic.
-
Alphabetical (A, B, C…): Click a letter to jump to entries beginning with that letter.
-
All: View the entire glossary on a single page.
Key Features
-
Bolded Keywords: Each glossary entry begins with a bolded term (like “MyCourses” or “Messages”), followed by a clear explanation of its function within Moodle.
-
Linked Terms: Many entries include links to related terms, allowing you to explore how different parts of Moodle connect.
A | B | C | D | E | F | G | H | I | J | K | L | M | N | O | P | Q | R | S | T | U | V | W | X | Y | Z | ALL
A |
|---|
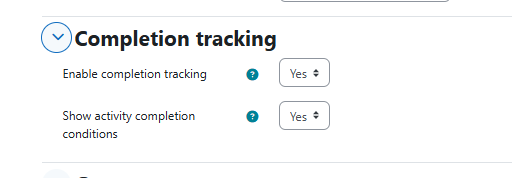
Activities - Activity CompletionActivity completion lets students know when they have a certain number of assignments to complete or items to view; this information is displayed underneath each section in the form of "Progress" information. You must turn tracking on for your course to use activity completion. (For information on how to turn on course Completion Tracking, see this tutorial: Turning On Completion Tracking)
| |||||||||||||||||||||


Activities - UngradedCreating an Ungraded ActivityThis tutorial will help you set up an ungraded activity that shows in your gradebook. (Forums can be set to "ungraded" and Quizzes can be set to have 0 points, but this means that neither of these activities will show up in your Gradebook.)
| |||||||||||||||||||||


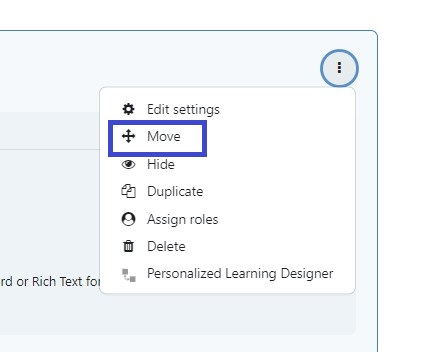
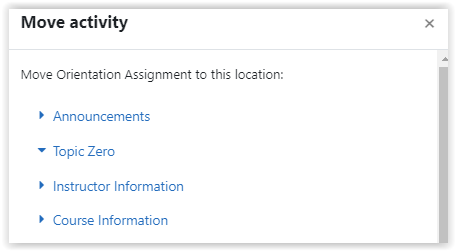
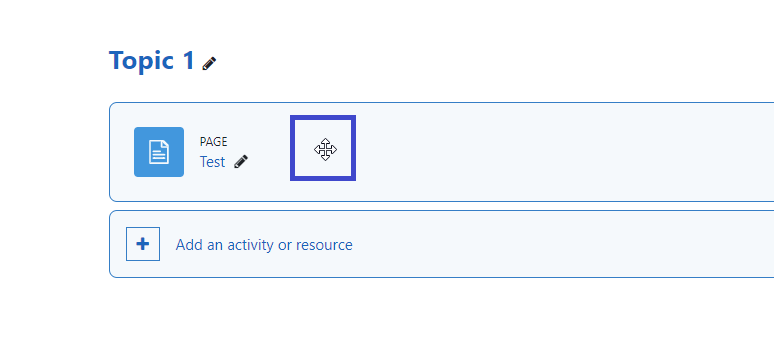
Activities or Resources - MovingYou may move items, assignments, activities, and resources within sections/topics or into different sections/topics. There are two ways to do this. A video tutorial can be found here: Moving Activities and Resources in Your Course
Questions? Please submit a Help Ticket to SCC E-Learning (under "Select Type of Help," choose "Moodle Assistance") | ||||||||||||||||||


AnnouncementsThe Announcements forum is a special forum for general news and announcements. This forum is automatically created in a new course. By default, it is placed in the top section of the course. As this section is displayed at the top of all course materials, it is a best practice to limit the content in this area to only the Announcements forum. The Announcements forum, includes only posts made by the instructor, and students cannot post in it. The forum has forced subscription set by default, which means that students will receive emails every time an announcement is posted. For a video tutorial, click here.
Questions? Please submit a Help Ticket to SCC E-Learning (under "Select Type of Help," choose "Moodle Assistance") | |||||||||||||||


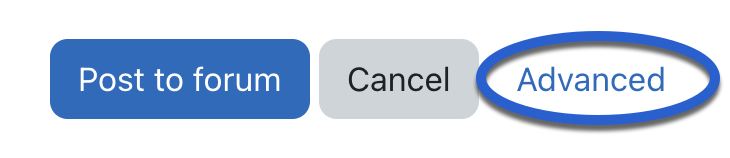
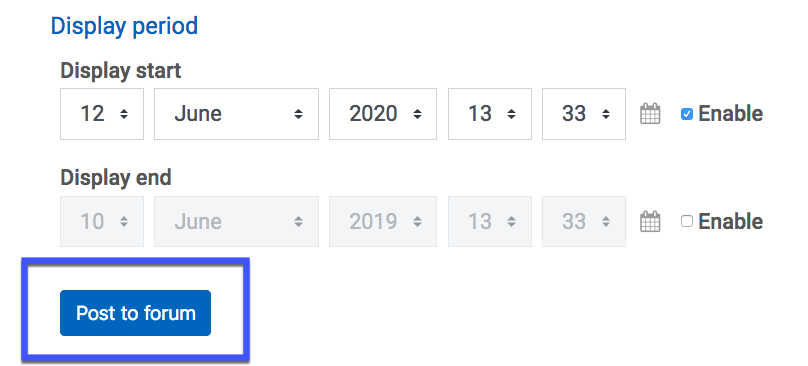
Announcements - SchedulingUse this tutorial to learn how to set your forum posts to be delayed and appear to students (and be emailed to them) later on.
| |||||||||||||||


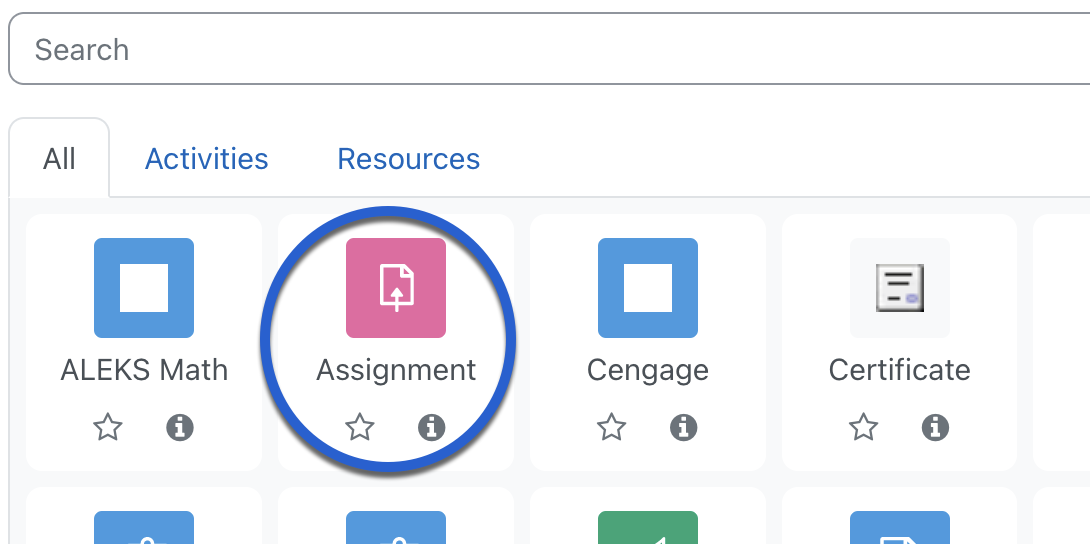
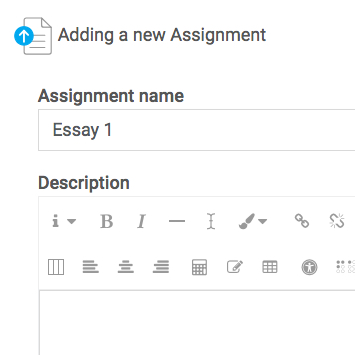
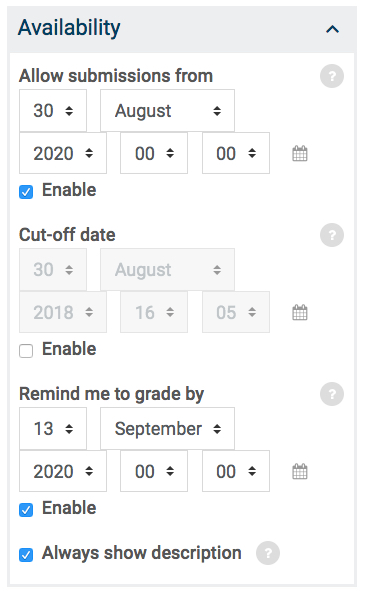
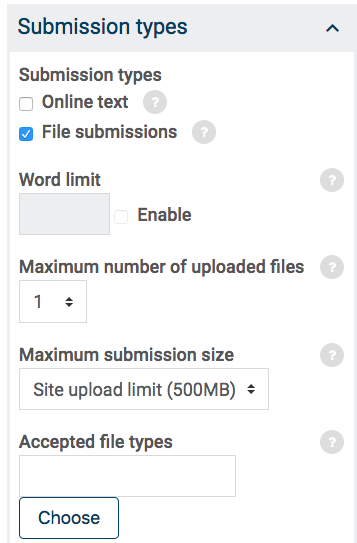
AssignmentsAssignments allow students to submit work to their teacher for grading. The work may be text typed online or uploaded files of any type the teacher’s device can read. When you create an assignment, you have the ability set it up to check for possible plagiarism using CopyLeaks. For a video tutorial, click here.
| |||||||||||||||||||||

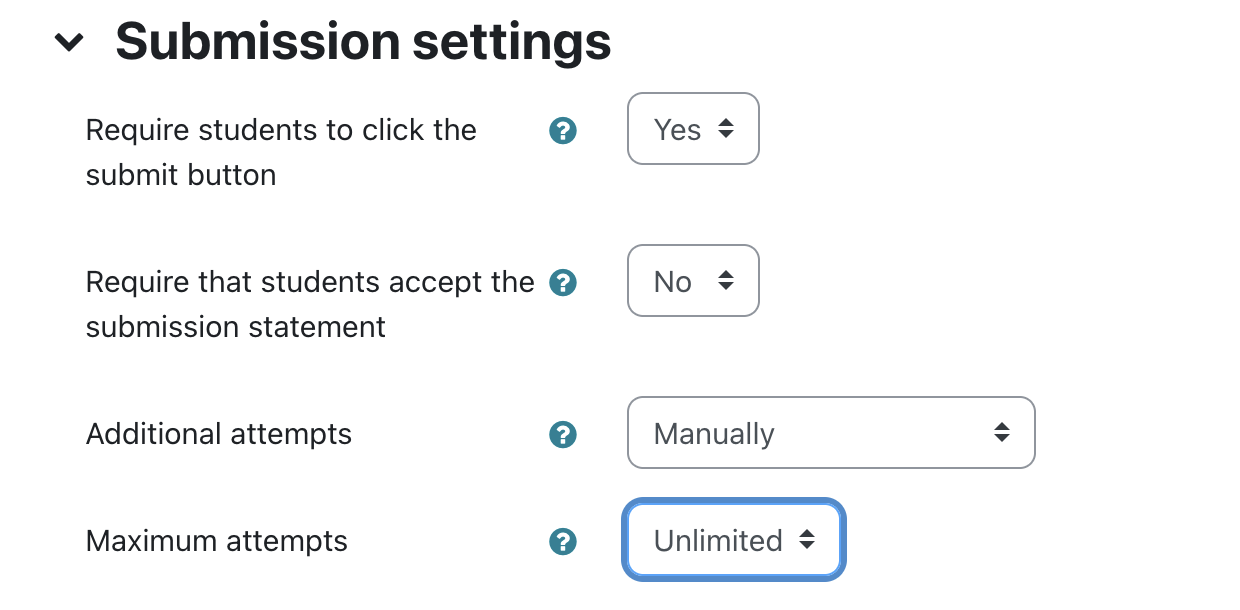
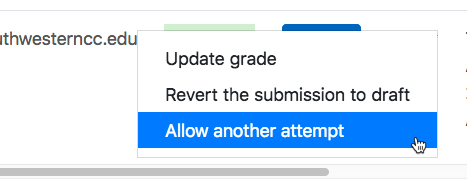
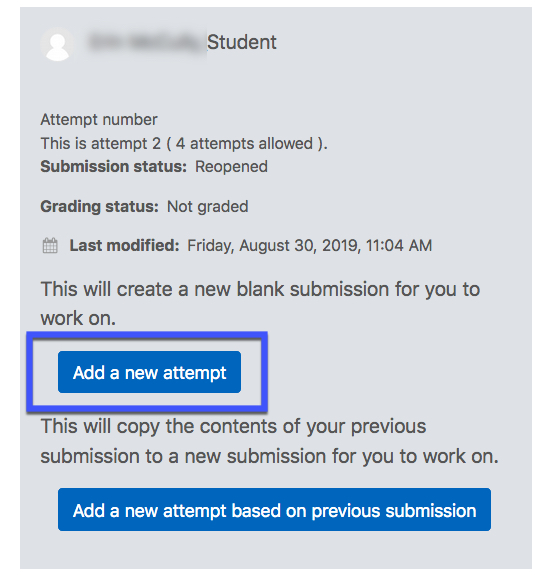
Assignments - Additional AttemptsYou may wish to allow another attempt on an assignment for a student. Follow this tutorial for steps to do so. A video tutorial can be found here: Allowing Another Attempt on an Assignment
| ||||||||||||||||||||||||


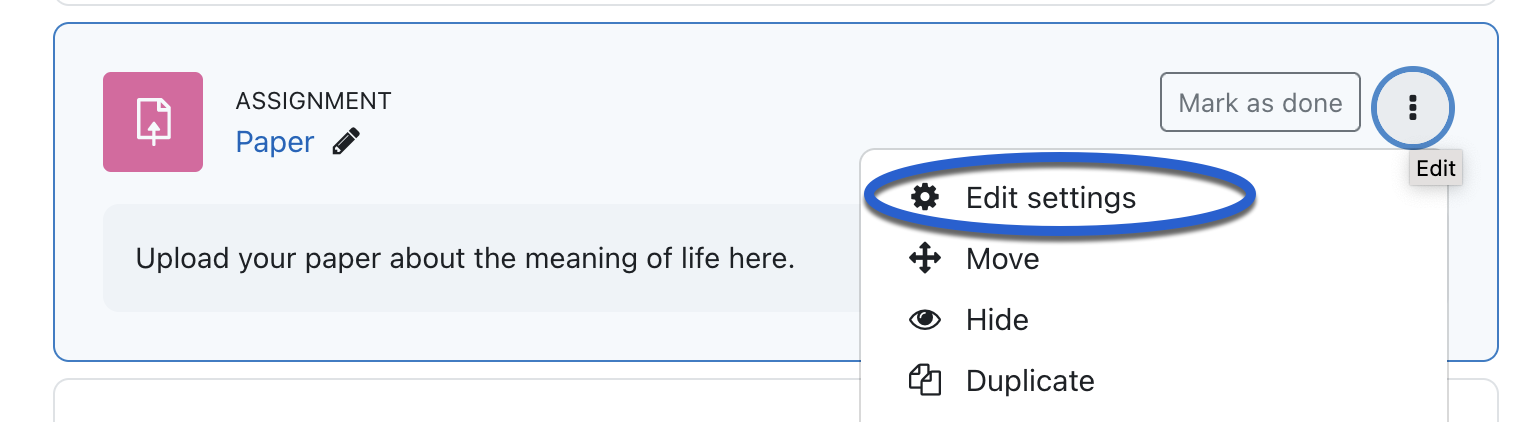
Assignments - EditingThis tutorial will walk you through editing an existing assignment. 1 This tutorial will walk you through editing an existing quiz.
| ||||||||||||


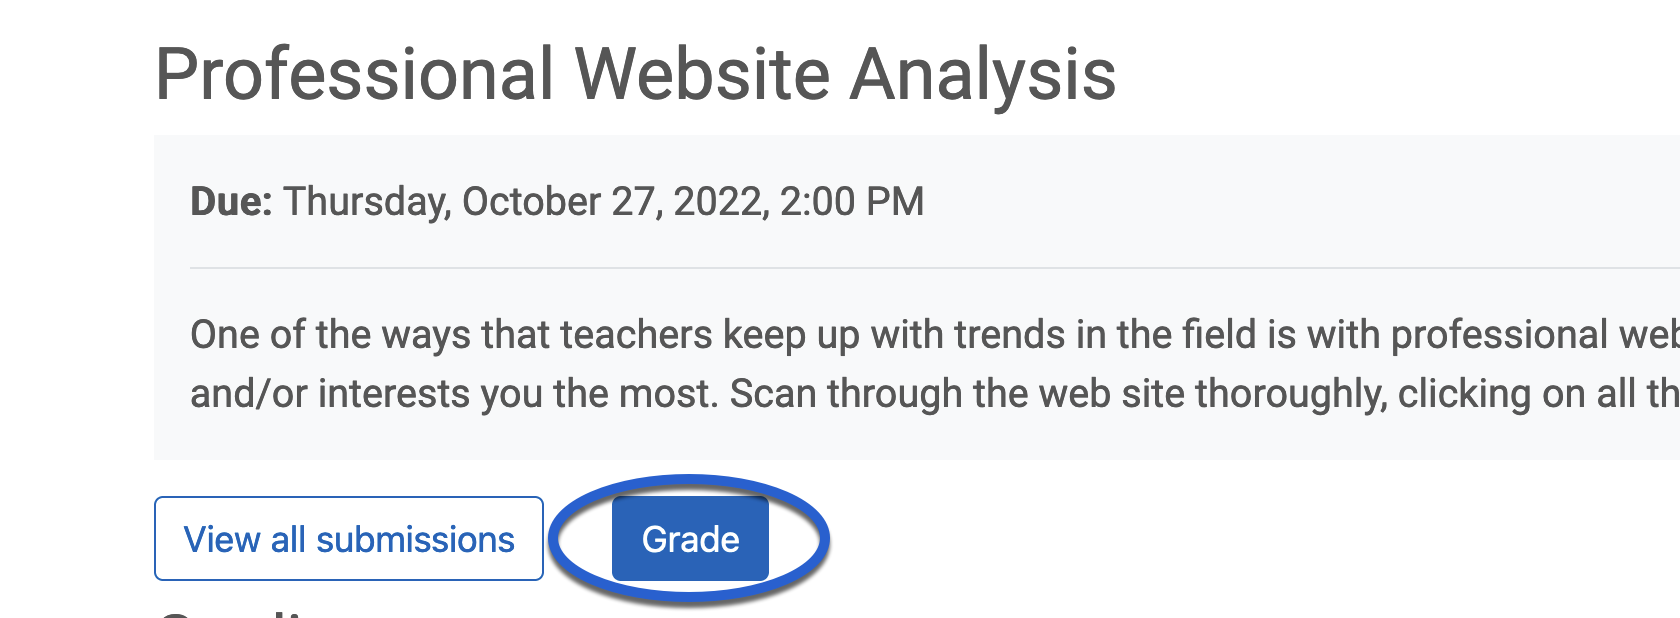
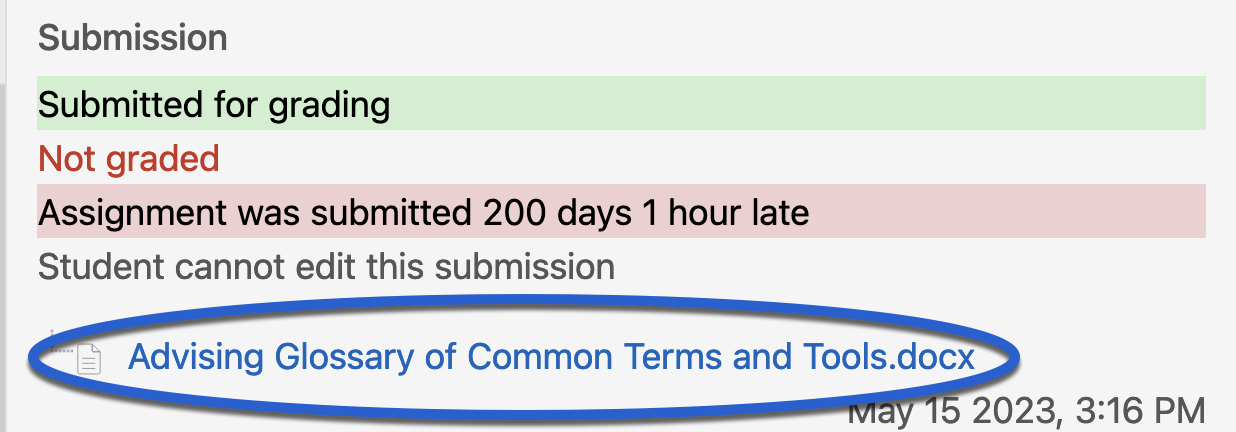
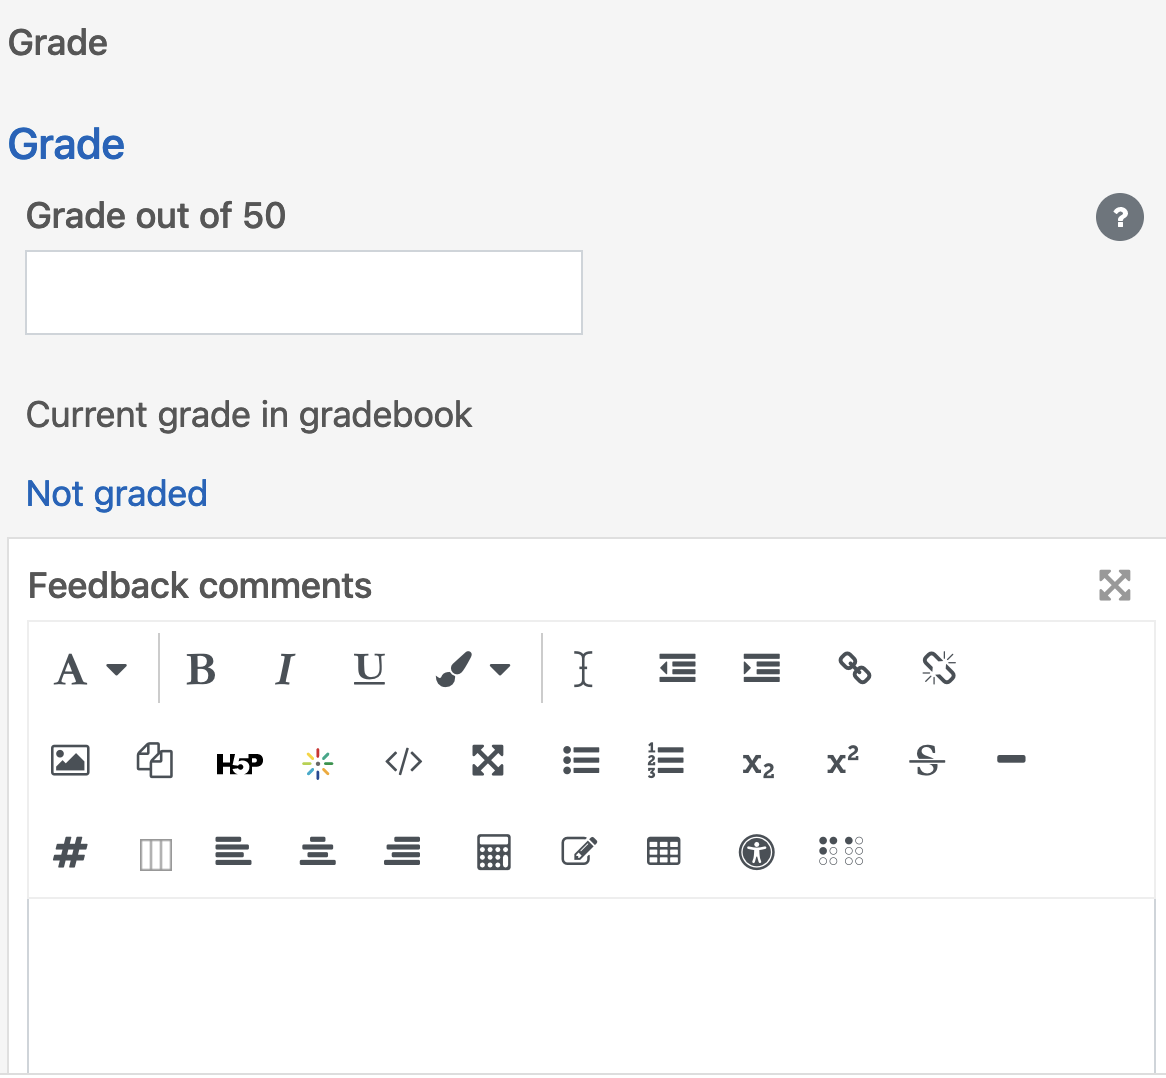
Assignments - GradingA video tutorial can be found here: Grading Assignments
| |||||||||||||||||||||


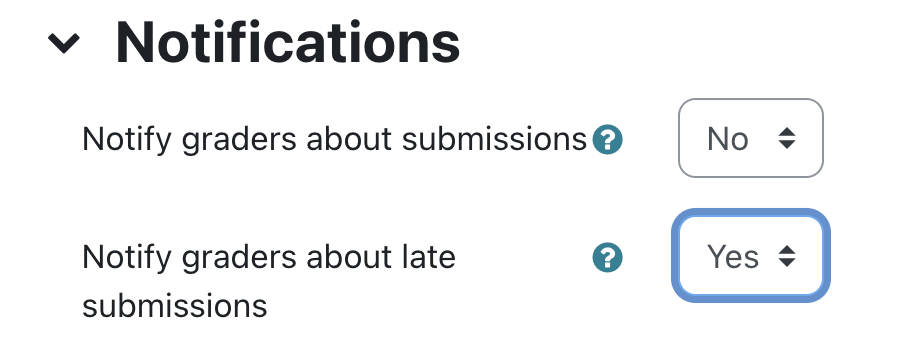
Assignments - Late Submission NotificationWhen students have submitted assignments after the due date set on an assignment, instructors can receive an email notifying them of this.
| |||||||||
C |
|---|
Calendar - Adding EventsAdding Events to the Calendar in your Course Assignments and quizzes with due dates will appear on the course calendar for users. However, instructors can also add calendar events for the course, which are visible to all users. Students can add User events, which are private and seen only by the user who created them.
| ||||||||||||||||||
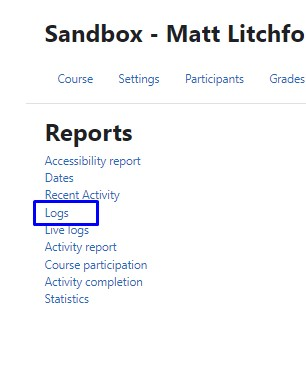
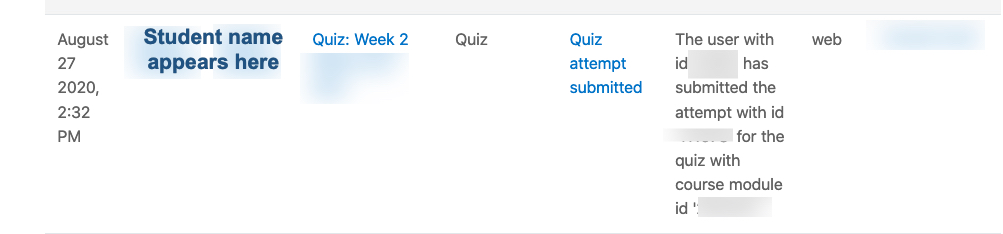
Census - Tracking Student Activity via LogsInstructors may use logs to see the actions of students in their courses, even the previous activity of students who have dropped or withdrawn from the course.
| |||||||||||||||


Changing the Read&Write Toolbar Settings | |
Changing the Read&Write Toolbar Settings | |
Changing the Read&Write Toolbar Settings | |
Changing the Read&Write Toolbar Settings | |
ChoiceChoice The choice activity module enables a teacher to ask a single question and offer a selection of possible responses. It's a good tool to get a simple response from students. For a video of this tutorial, click here.
| ||||||||||||||||||||||||
Completion TrackingActivity completion lets students know when they have a certain number of assignments to complete or items to view; this information is displayed underneath each section in the form of "Progress" information. You must turn tracking on for your course to use activity completion. (For information on how to turn on course Completion Tracking, see this tutorial: Turning On Completion Tracking)
| |||||||||||||||||||||
ConceptDefinition | |
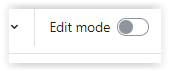
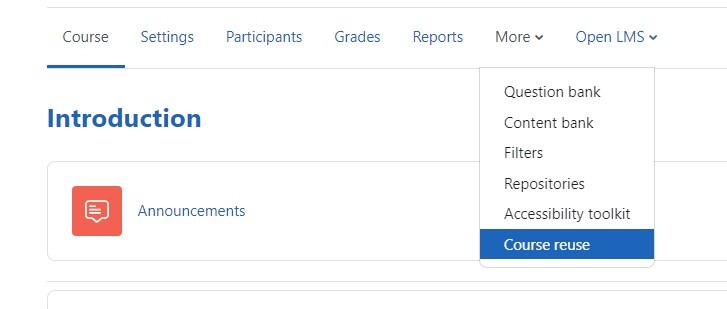
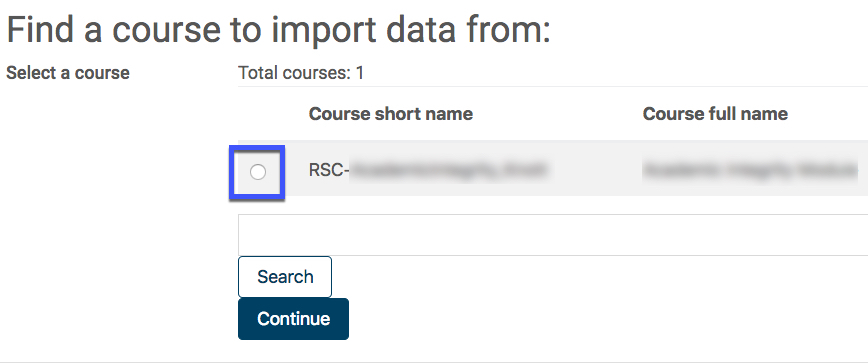
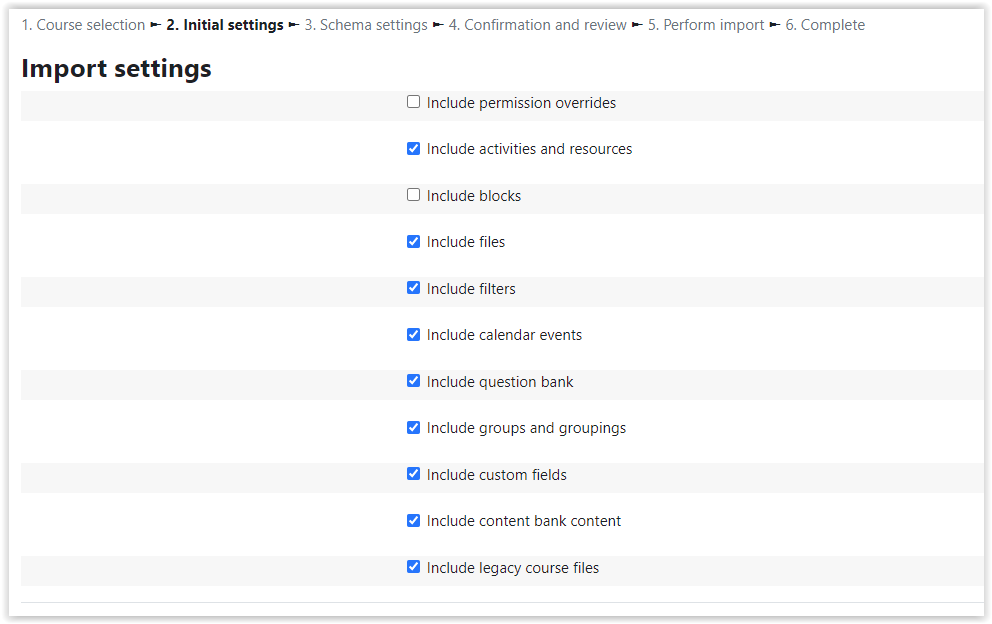
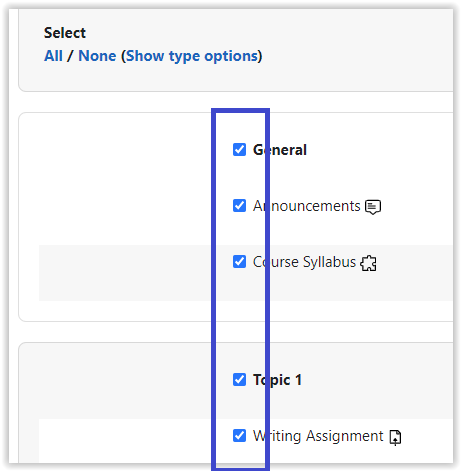
Copying or Importing Your CourseImporting (Copying) Your Course The process for copying content from one course to another in Moodle is called "import." To copy content from one course to another, you will need to start in the destination course (where you wish the content to appear). For a video tutorial, click here: Copying Materials from Another Course
| ||||||||||||||||||||||||


Copying Part of Your Course to Another CourseA video tutorial can be found here: Copying Materials from Another Course
| |||||||||||||||||||||
Copyleaks - Putting a Copyleaks Resource in Your CourseThis resource allows you to submit files to Copyleaks. It can be very useful for submissions that were not automatically submitted.
| ||||||||||||||||||


Course Card ImagesAdding a Course Card Image If you wish to add some personalization to your course, you may want to add a course image that will appear on the "My Courses" page.
| |||||||||||||||
D |
|---|
Dates ReportUpdate | |
Downloading All Submissions from AssignmentsDownloading All Submissions from Assignments If you prefer to grade offline, you may download all of the student submissions to an assignment simultaneously.
| ||||||||||||
Downloading Your GradebookDownloading Your Gradebook Instructors may wish to download gradebooks for record keeping.
| |||||||||
F |
|---|
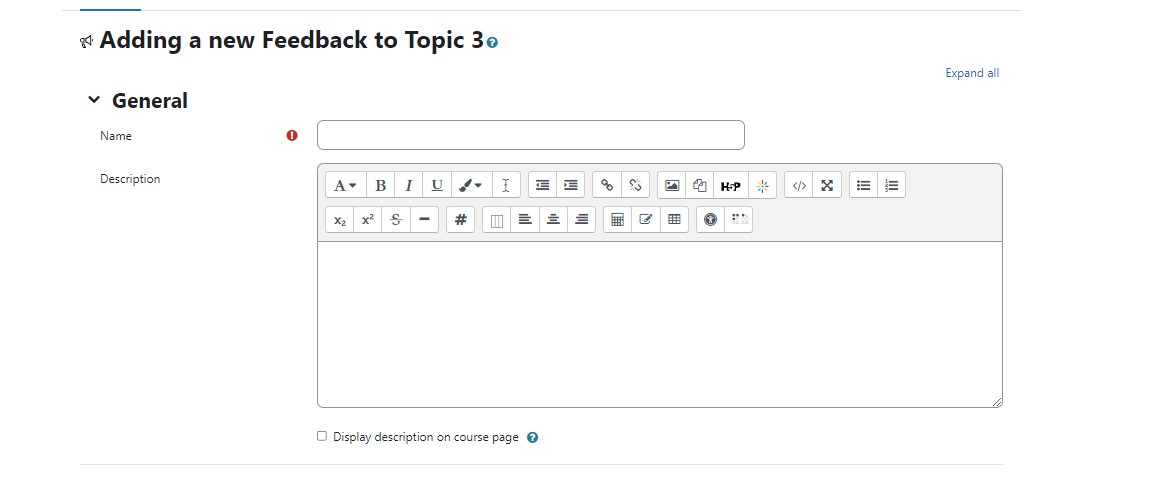
FeedbackFeedback The feedback activity enables instructors to create a custom survey for collecting feedback from students using a variety of question types, including multiple choice, yes/no or text input. A video tutorial can be found here: Feedback
| |||||||||||||||||||||


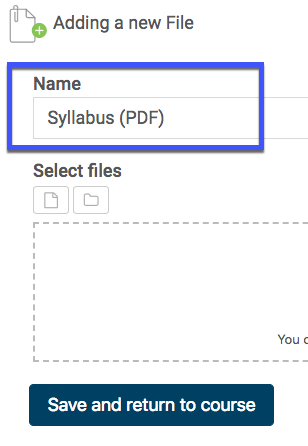
FileAdding Files This tutorial will help you upload a file, such as a syllabus, into your Moodle course. Most files can be uploaded and accessed through Moodle, but the student needs to have the correct software to be able to open them. For a video tutorial, click here.
| |||||||||||||||||||||
File (Resources)Adding FilesThis tutorial will help you upload a file, such as a syllabus, into your Moodle course. Most files can be uploaded and accessed through Moodle, but the student needs to have the correct software to be able to open them. Click here to access an adding files video walkthrough. (Video files are too large for the Moodle server, so click here for instructions on using the Yuja Streaming Server for video files).
| |||||||||||||||||||||


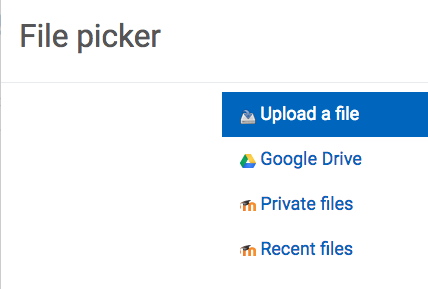

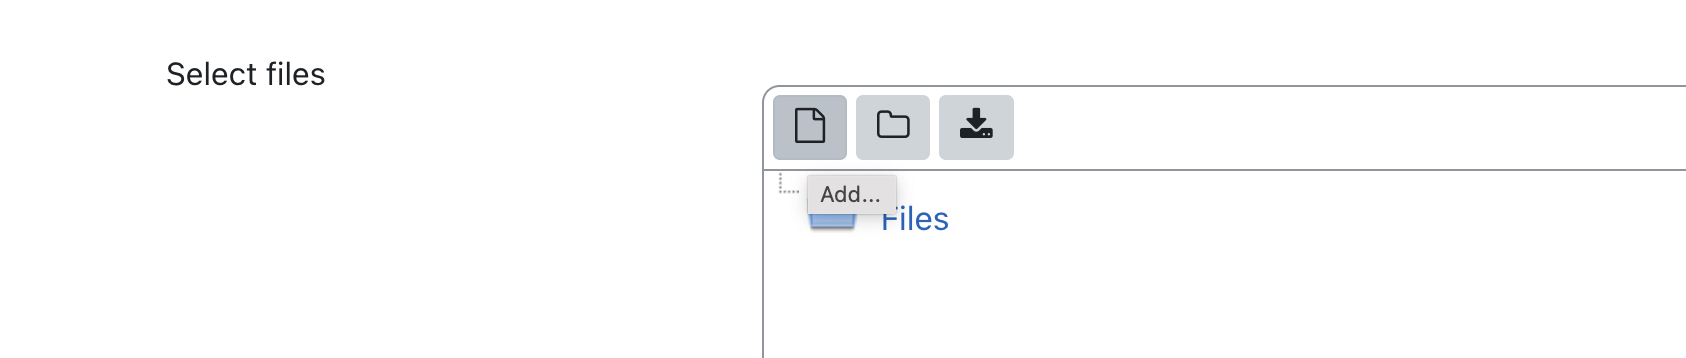
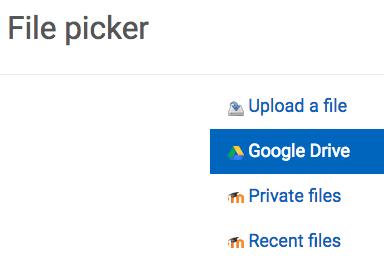
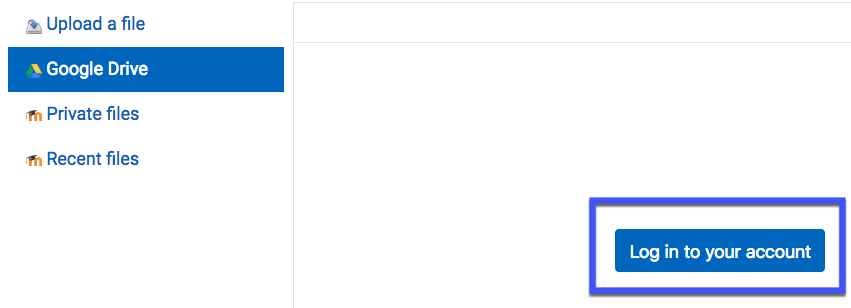
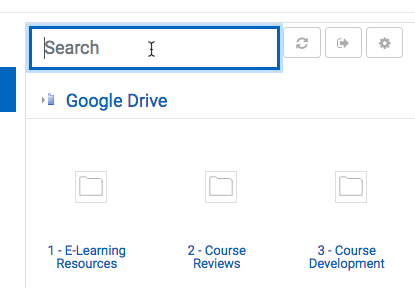
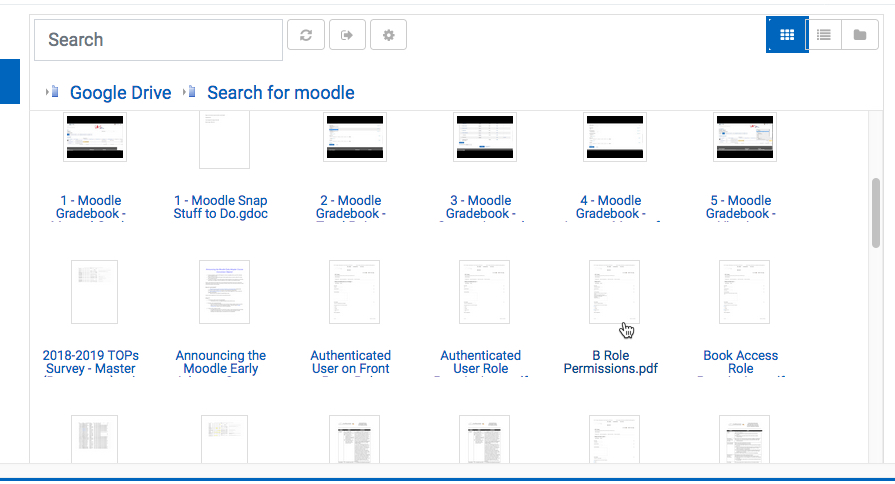
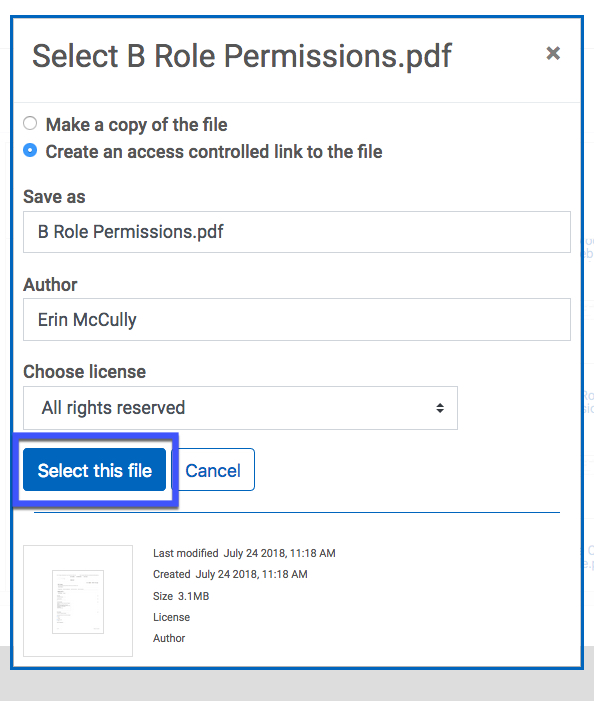
File - Adding from Google DriveInserting a File using Google Drive Moodle provides an easy way to share files with students via Google Drive. When you insert a file from Google Drive into Moodle using the steps below, Moodle will automatically update the sharing settings so that students may view and download the files.
| |||||||||||||||||||||||||||||||||
File - MovingYou may move items, assignments, activities, and resources within sections/topics or into different sections/topics. There are two ways to do this. A video tutorial can be found here: Moving Activities and Resources in Your Course
Questions? Please submit a Help Ticket to SCC E-Learning (under "Select Type of Help," choose "Moodle Assistance") | ||||||||||||||||||


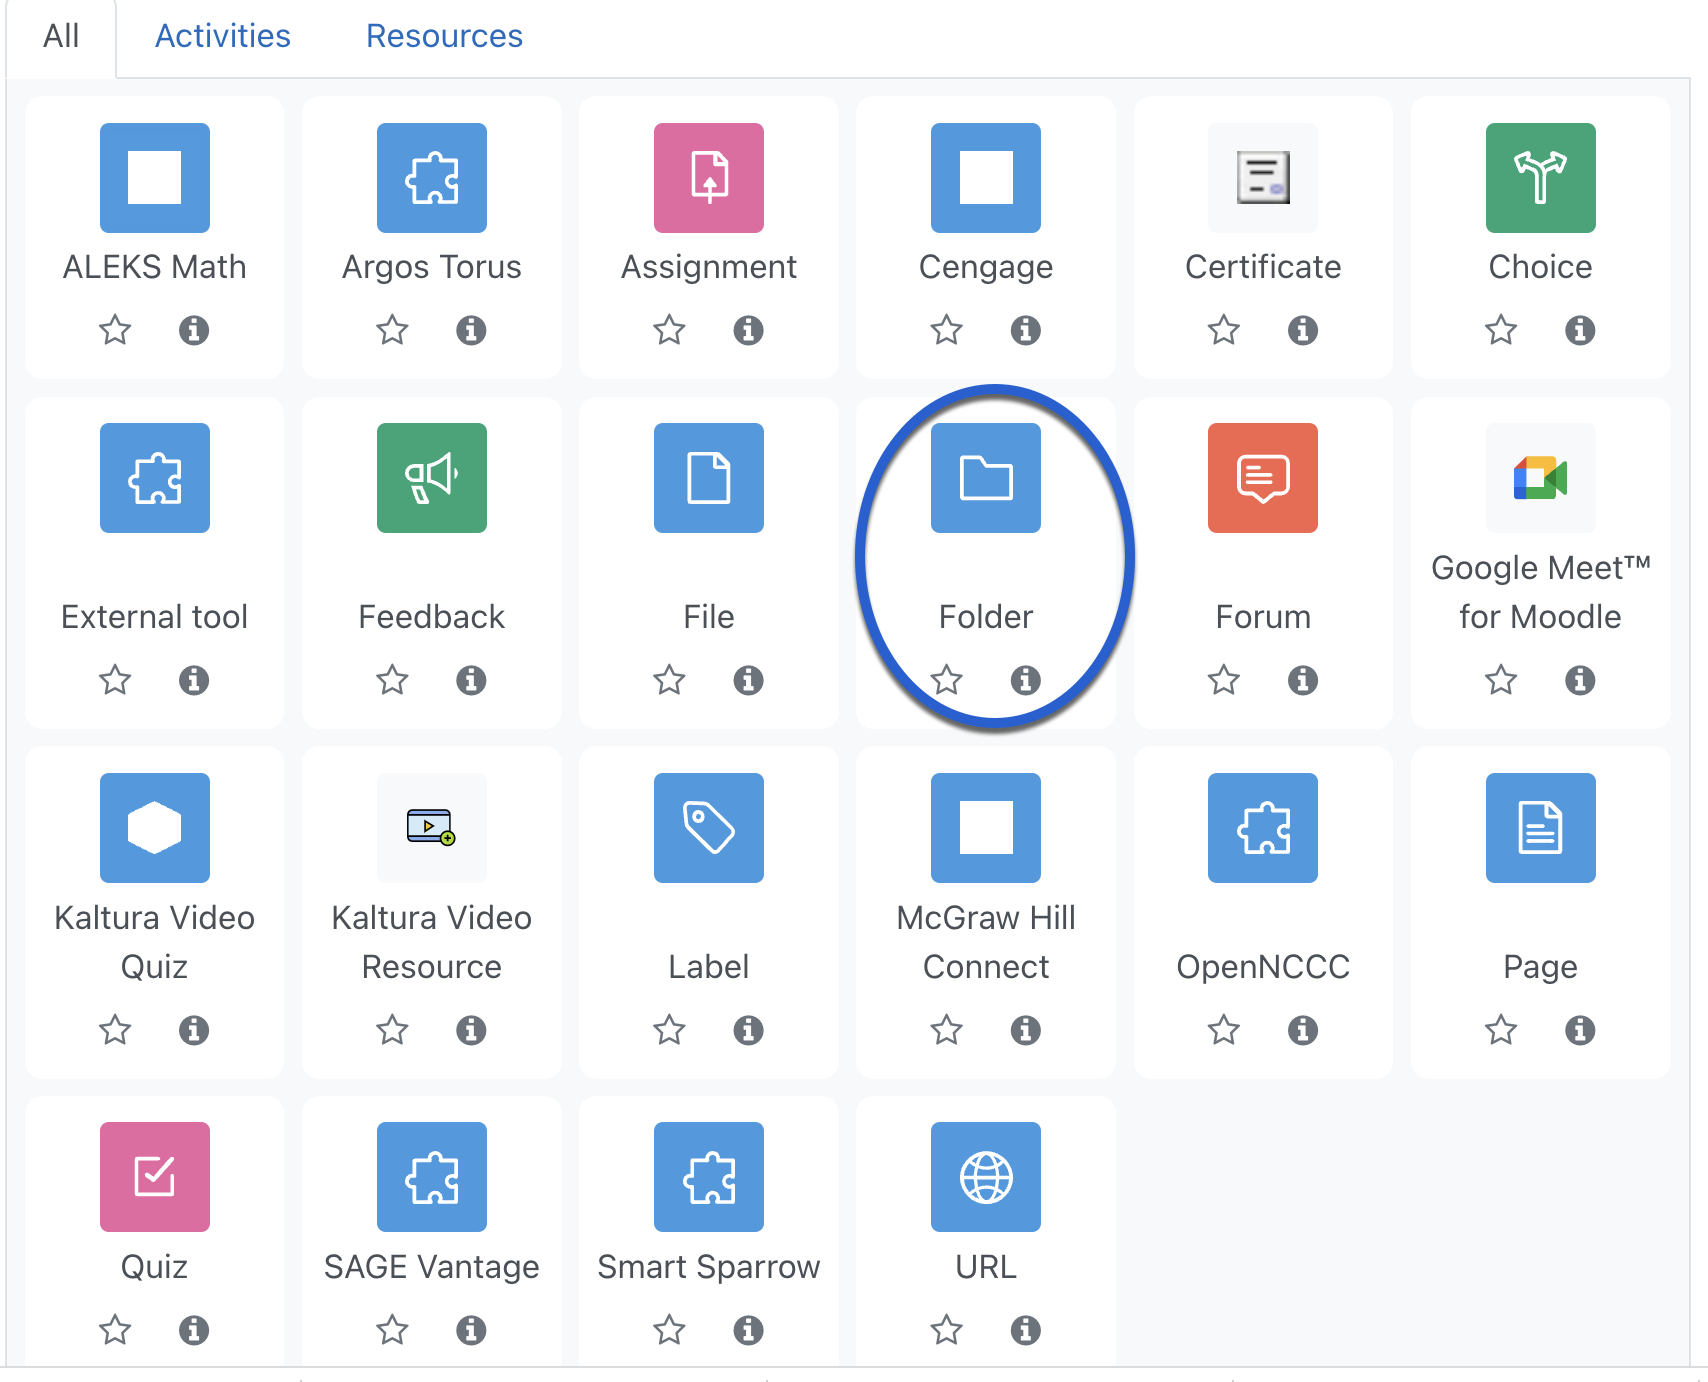
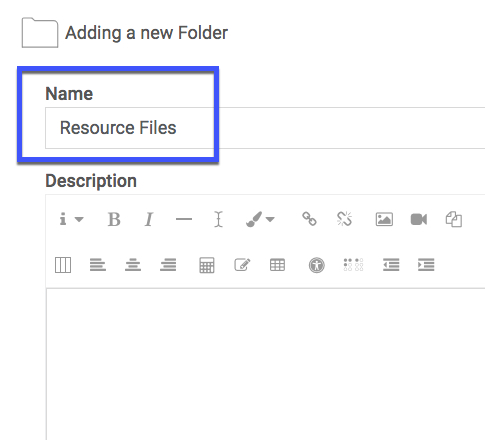
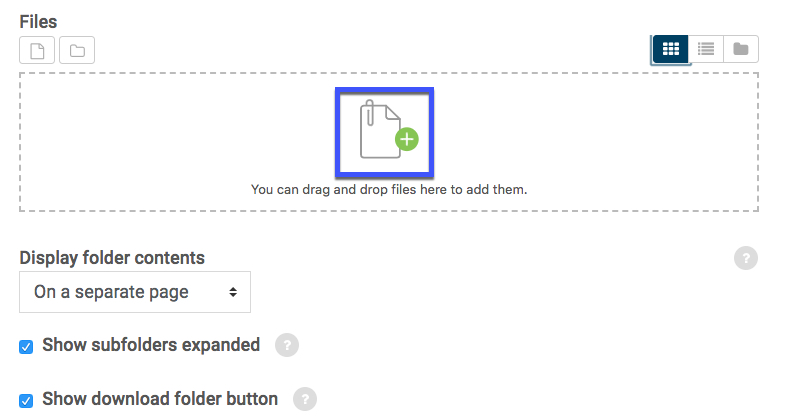
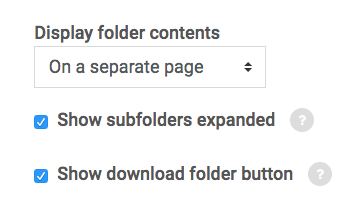
FolderFolder The Folder resource allows instructors to organize files. Activities (such as assignments and quizzes) and most resources (such as URLs, labels, and pages) cannot be added into folders.
| ||||||||||||||||||

Forum - Adding a Comments Field to a Forum for Feedback (Using a Grading Guide)
A video tutorial can be found here - Moodle 4.0 - Adding a Comments Field to a Forum for Feedback
| |||||||||||||||


Forum - Q&A ForumQ & A Forums are "question and answer" forums. Instructors begin the process by adding a discussion post including their questions. Students then must post at least one reply before they can see and reply to others. This encourages individual responses to questions. A video tutorial can be found here: Q&A Forums *Note: There is a bit of lag time (approximately 15 minutes) between when students post their first reply, and when they can see classmates' replies.
| |||||||||||||||||||||||||||


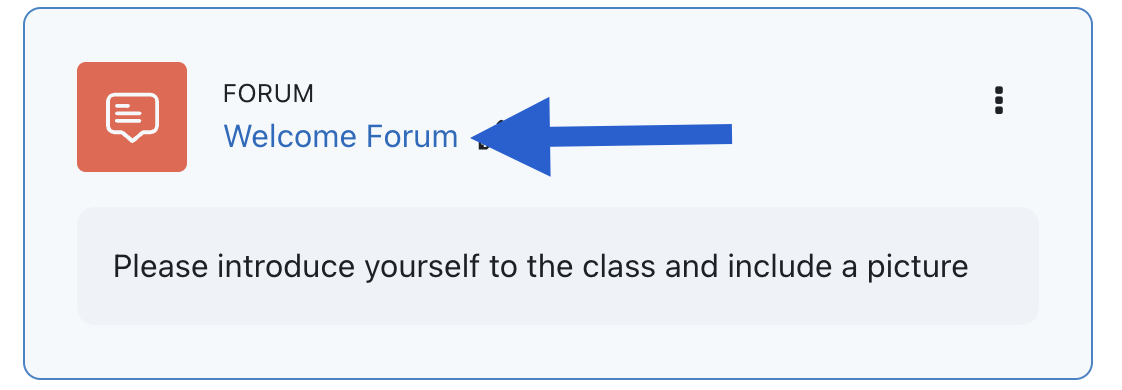
ForumsThe Forum activity allows students and teachers to exchange ideas by posting comments as part of a "thread." Files such as images and media may be included in forum posts. A video tutorial can be found here: Creating a New Forum
| ||||||||||||||||||||||||

Forums - Adding Comments to GradesThis tutorial will show you how to comment on forum posts while grading them.
| |||||||||||||||


Forums - Displaying Word CountsDisplaying Word Counts in Forum Posts You may wish to easily see the number of words students use in their discussion forum posts. This tutorial shows you how.
| ||||||||||||
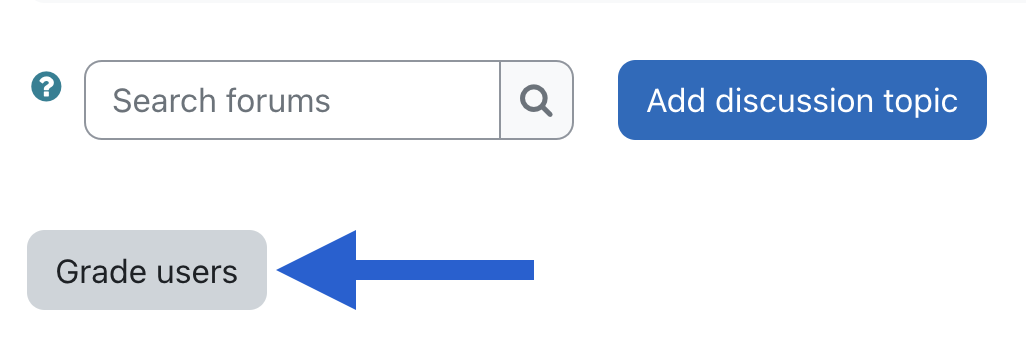
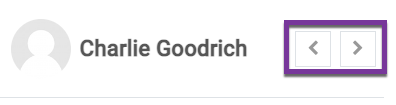
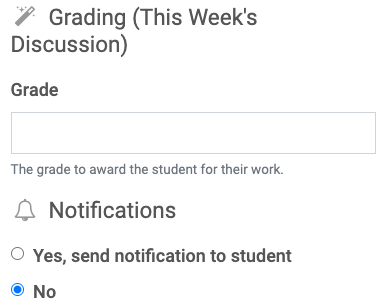
Forums - Grading
| |||||||||||||||

Forums - Q and AQ&A Forum Q & A Forums are "question and answer" forums. Instructors begin the process by adding a discussion post including their question. Students then must post at least one reply before they can see and reply to others. This encourages individual responses to questions. *Note: There is a bit of lag time (approximately 15 minutes) between when students post their first reply, and when they can see classmates' replies.
| |||||||||||||||||||||||||||
Forums - RubricsUsing Rubrics to Grade This tutorial will show you how to use rubrics to grade student work. You must first create a rubric in order to use it to grade student work. If you have not yet created a rubric, click here for more information.
| ||||||||||||||||||
Forums - Scheduling PostsScheduling Forum Posts Use this forum to learn how to set your forum posts to be delayed and appear to students (and be emailed to them) later on.
| |||||||||||||||
Forums - Subscribing and UnsubscribingSubscribing and Unsubscribing from a Forum The forum activity allows students and teachers to exchange ideas by posting comments as part of a "thread." Faculty and students may receive emails when users post to the forum. If you wish to unsubscribe from these emails, please use this tutorial. Note: If you wish to remain unsubscribed from all forums, whether you post or not, please see this tutorial (link opens in a new window).
| ||||||
G |
|---|
Google File (Resources)Adding Files from Google DriveMoodle provides an easy way to share files with students via Google Drive. When you insert a file from Google Drive into Moodle using the steps below, Moodle will automatically update the sharing settings so that students may view and download the files.
| ||||||||||||||||||||||||||||||||||||


Google MeetCreating a Live Virtual Class using Google Meet Google Meet for Moodle allows instructors to create a live virtual class meeting. Please note: Google Meet works best in the Chrome browser.
| |||||||||||||||||||||
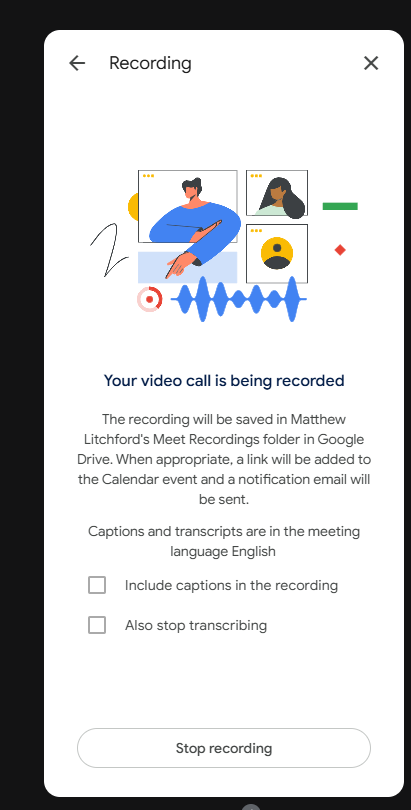
Google Meet - Adding Recordings to MoodleAdd Google Meet Recordings to MoodleAfter recording a Google Meet for Moodle session, you can add the recordings to Moodle so that your students can access them easily.
CAUTION: Do not change the name of the Meet Recordings folder on your Google Drive in any way. This folder is where Google Meet saves recordings and where the Google Meet for Moodle module searches for recordings. | ||||||||||||


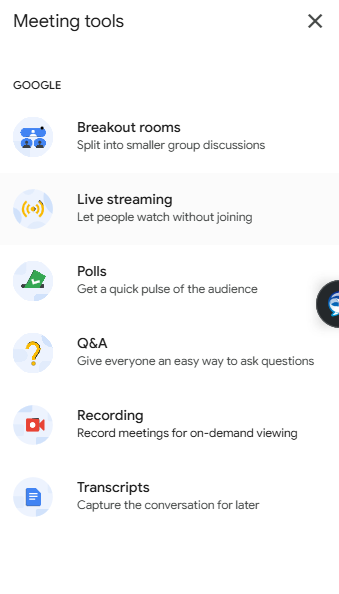
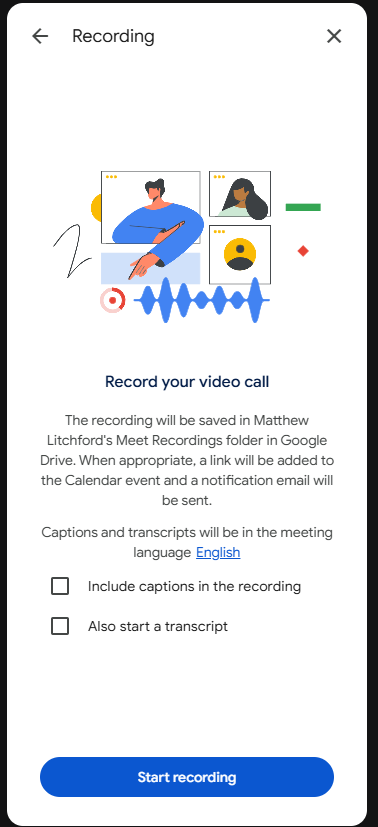
Google Meet - RecordingFollow the steps below to record a Google Meet session. You can only record from a computer. The mobile apps for Google Meet do not have a record function.
| |||||||||||||||

Google Meet - SharingSharing a Google Meet Session with Students
| ||||||


Google Meet - Using CaptionsUsing Captions while in Google MeetGoogle has made Closed Captioning available while using their Google Meet function. It's not perfect, but it's an excellent automated tool to increase accessibility during an online meeting.
| ||||||


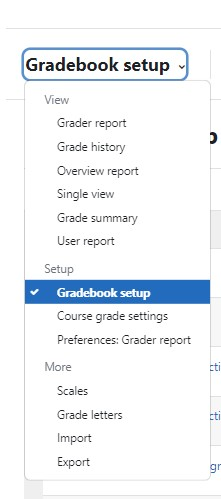
Gradebook - Editing CategoriesEditing Gradebook CategoriesEditing Gradebook Categories
| ||||||||||||

Gradebook - Calculating an Average (Mean of Grades)If you set your Gradebook to calculate the mean of grades, the course grade will be the sum of all grades divided by the total number of grades.
| ||||||||||||
Gradebook - Calculating Points (Natural)The default setting for a Moodle gradebook is "natural" (also known as "sum of points"). An entry with a maximum grade of 100 points is significantly more "weighty" than one with a maximum grade of only 10 points.
| ||||||||||||

Gradebook - Calculating Weighted Average (Weighted Mean of Grades)A weighted average allows you to assign weight to activities while not adjusting each activities' point value. If you use weights or weighted totals to determine the students' overall grades in your course, you may need to use categories when organizing the gradebook. For a tutorial on creating categories click here.
| |||||||||||||||

Gradebook - CategoriesCategories allow for several grades of a single type of material (e.g. homework, quizzes, etc.) to all be graded the same way. Also, if you use weights to determine the students' overall grades in your course, you must use categories when organizing the gradebook.
| ||||||||||||||||||

Gradebook - Dropping the Lowest GradeNOTE: You can only drop the lowest value in the following aggregations with the following situations:
| ||||||||||||


Gradebook - Exclude GradesThis tutorial describes how to exclude a single grade from the overall course grade in the Gradebook. How you exclude a grade will depend on your gradebook set up.
| |||||||||||||||||||||
Gradebook - Extra CreditUpdate | |
Gradebook - Inserting Grades in BulkInserting Grades in Bulk The Perform bulk insert function allows instructors to fill all grades or fill only empty grades with a set score. This feature is valuable when you need to fill in a grade of 0 for any missing assignments from students. Another example might be if many students earned the same grade for an assignment and you'd like to keep from typing the same number over again.
| ||||||||||||||||||
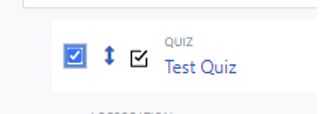
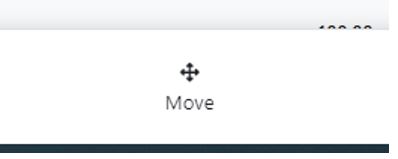
Gradebook - Moving Gradebook ItemsIf you do not yet have a category created in your Gradebook, please start with this tutorial.
| ||||||||||||

Gradebook - Moving Items into a CategoryIf you do not yet have a category created in your Gradebook, please start with this tutorial. A video tutorial can be found here: Moving Items into a Gradebook Category.
| ||||||||||||

Gradebook - Overriding GradesThe Override grade function allows instructors to update a grade. This tutorial will also demonstrate how to reverse an override.
| ||||||||||||||||||||||||||||||
Gradebook - Sending a Message based on Grade RangeIf you would like to send a message to a group of students by grade range (i.e. some students who did not do well on a quiz), you may do so by messaging directly from the Gradebook. You can choose either a specific activity/assignment or a grading category to generate the grade range.
| |||||||||||||||
Gradebook - Using GroupsWhen teaching a course with multiple sections, especially when a course has a large number of students, using groups in conjunction with the gradebook makes it much easier to filter student data. Multi-section courses automatically have groups created for each section, which you can use in addition to or instead of your own custom groups. Note: You will not be able to sort the gradebook using groups unless you have created groups for your course. Please see this tutorial.
| ||||||||||||
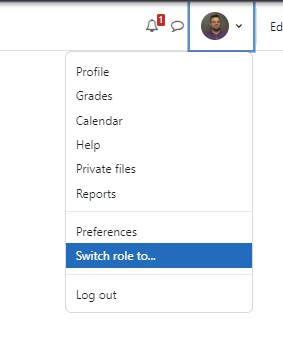
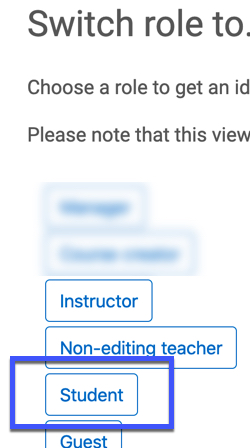
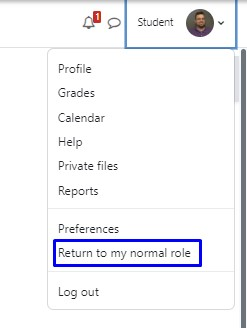
Gradebook - View as a StudentIn this tutorial, you will learn how to view your course as a student.
| ||||||||||||
Grades - Moving Categories and Columns in the GradebookThis tutorial will show you how to move categories and grade columns in the grade book. A video tutorial can be found here: Moving Categories and Columns in the Gradebook
| ||||||||||||


Grading - RubricsThis tutorial will show you how to use rubrics to grade student work. You must first create a rubric in order to use it to grade student work. If you have not yet created a rubric, click here for more information.
| ||||||||||||||||||
Grading GuidesUsing a Marking Guide A marking guide is an advanced grading method that allows an instructor to create a set of criteria for a Moodle assignment activity, optionally share these criteria in advance with students, and grade each criterion using a range of values. It also allows you to build a set of frequently-used comments to use when grading.
| ||||||||||||||||||||||||||||||
GroupsUpdate | |
H |
|---|
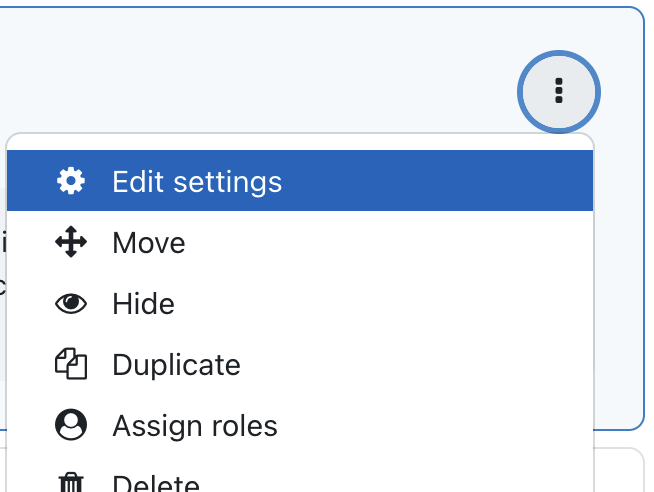
Hiding or Showing Activities and Resources to StudentsYou may hide items, assignments, activities, resources, and entire sections in your course. A video tutorial can be found here: Hiding/Showing Activities and Resources to Students
Questions? Please submit a Help Ticket to SCC E-Learning (under "Select Type of Help," choose "Moodle Assistance") | ||||||||||||
Highlighting a Topic or SectionIn this tutorial, you will learn how to highlight a section of your course so that students immediately go to that section upon entering the course.
| ||||||
L |
|---|
Logs - Activity of Dropped or Withdrawn StudentsIf a student is withdrawn from a course, the instructor may wish to view the student's activity afterward in the gradebook. To do so, follow this tutorial.
| ||||||||||||||||||||||||
M |
|---|
Making Exceptions for Students on ActivitiesUser overrides allow you to edit the settings of an activity for a specific student. You can open or close the quiz at a different time or date for an individual, for example. You might also choose to allow a student more time on a timed test. You can edit the override any time. A video tutorial can be found here: Overriding Settings/Making Exceptions
| ||||||||||||
Manual Grade ItemsMoodle automatically adds assignments and quizzes into the gradebook. Additionally, forums can be set to add an item to the gradebook.
| ||||||||||||

Manual Items - GradingIf you have created grade items in the Gradebook Setup area directly (for items such as participation grades or a test students take in person and hand in to you), you can assign those grades in the Gradebook. You can also use this same method to overwrite a grade for any other grade column as well, even if it was automatically graded.
| ||||||||||||||||||
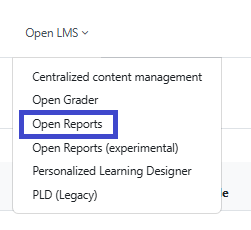
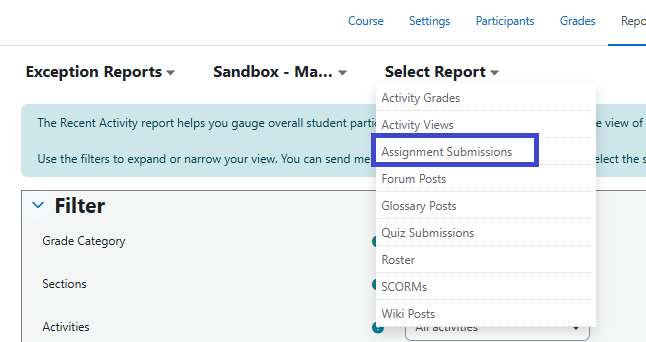
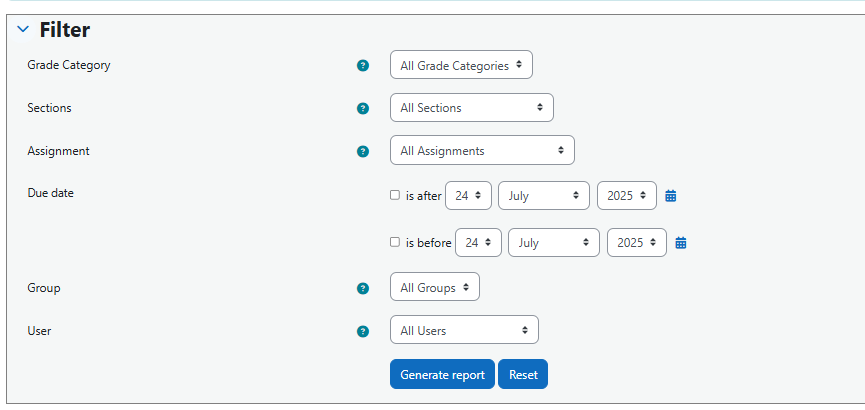
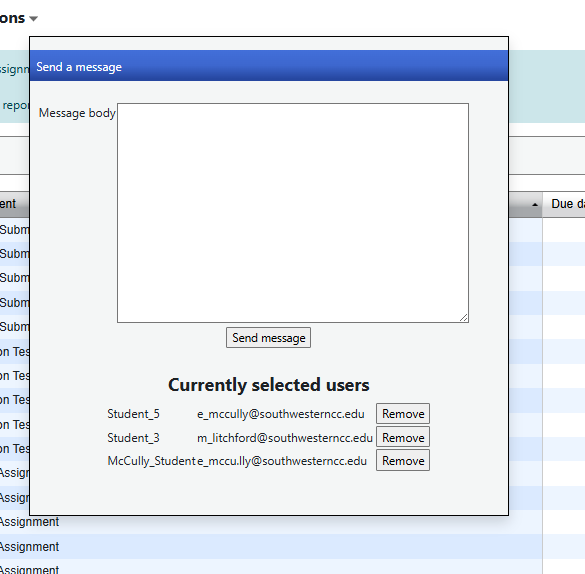
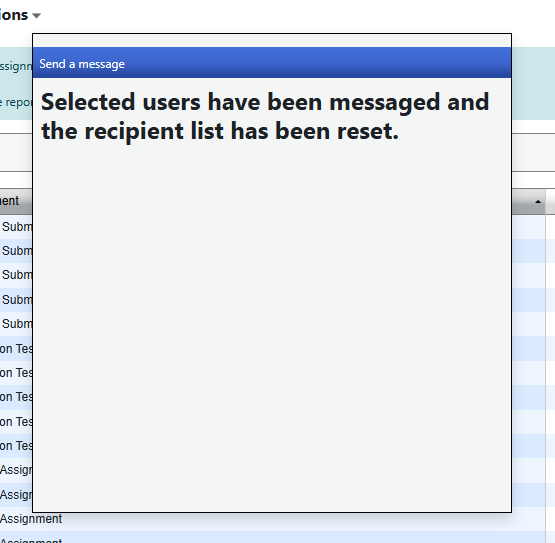
Messaging Student RemindersIf you want to send a message to students who have not completed a specific activity, you can use the Open Reports tool to do so.
| ||||||||||||||||||||||||


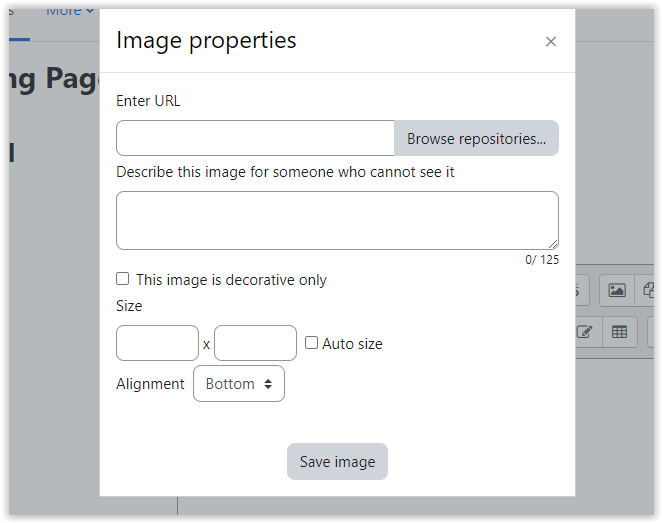
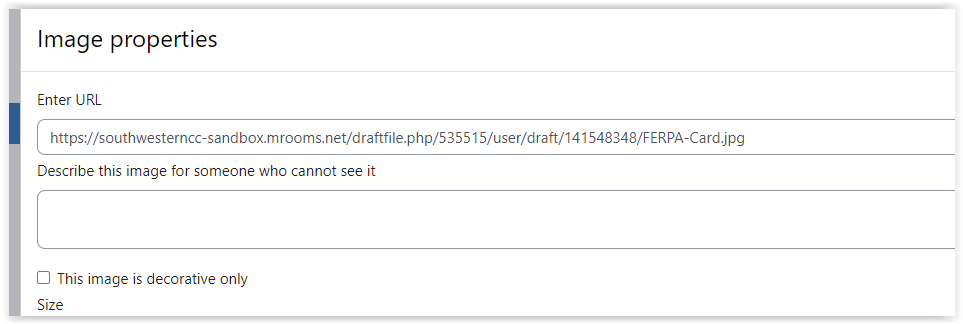
Moodle - Alt-Text and ImagesAlternative text, or “alt text” describes the content of images, graphs and charts. It should be added to every image that conveys meaning in instructional and communications materials including Moodle sites, word processing documents, and slide presentations. If you try to upload and save an image in Moodle, Moodle will prompt you to add descriptive text to the file. A video tutorial can be found here -
| |||||||||||||||


Moodle - Turning On Completion TrackingCompletion tracking lets students know when they have a certain number of assignments to complete or items to view; this information is displayed underneath each section in the form of "Progress" information. If you wish to turn this off or on, follow these instructions.
| ||||||||||||

Moodle - Viewing Your Course as a StudentIn this tutorial, you will learn how to view your course as a student.
| ||||||||||||
Moodle Mobile AppUsing the Open LMS Moodle Mobile App The Open LMS Moodle Mobile App is available to download here (iOS) or here (Android). Depending on your internet speed and reliability, with the Open LMS Mobile App, you can: If you are not an app user, you can also use Moodle via your phone or mobile device's internet browser (i.e. Safari or Chrome, etc.). Please note: SCC recommends that students complete assignments, discussion forum posts, quizzes, and other important activities from a computer, not a mobile device, for improved reliability.
| |||||||||||||||
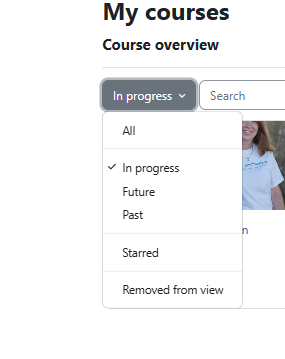
My Courses - SortingSorting courses in Moodle is fairly simple. In the My Courses tab, a drop-down menu allows you to choose which courses to display. | |
N |
|---|
Notifications - PreferencesInstructors and students have the option to set up email confirmation notifications for doing such things as submitting assignments and quizzes, as well as receiving emails of forum digests when subscribed to discussion forums. For a video tutorial, click here.
Questions? Please submit a Help Ticket to SCC E-Learning (under "Select Type of Help," choose "Moodle Assistance") | ||||||||||||
P |
|---|
PagesA page resource creates a webpage that displays content added by the instructor. A page can display text, images, sound, video, and web links. For a video tutorial, click here.
| ||||||||||||||||||
Participants - FilteringWhen clicking on the Participants tab in the Course Dashboard, instructors will see both students who are "Suspended" who have dropped the course and students who are "Active" who are still enrolled. To see only the students currently enrolled in the course, click on the filter at the top of the page and choose "Status - Active". Only active students have access to the course.
| ||||||||||||||||||
Proctoring - Viewing Resultsin RespondusViewing the Results of Online Test Proctoring (using Respondus LockDown Browser)
| |||||||||||||||
Profile PictureIt is helpful to have your picture in your profile, as students are more likely to feel a connection with their instructor if they see a picture. Your profile picture will be visible in the courses you are teaching, as well as in the students' My Courses page, on the course card. For a video tutorial, click here.
Questions? Please submit a Help Ticket to SCC E-Learning (under "Select Type of Help," choose "Moodle Assistance") | ||||||||||||||||||
Q |
|---|
QuickmailInstructors can use Quickmail in Moodle to email students. The email will appear in students' SCC email accounts with a subject line that includes the ID number of the course (i.e. "[ACA-111-WC1-2020FA] Your Email Subject Line Here").
| |||||||||||||||||||||
QuizzesThis tutorial will assist you in creating your quiz activity, but you will add questions to the quiz activity in a later tutorial. A video tutorial can be found here: Creating a Quiz
| ||||||||||||||||||
Quizzes - Accessing StatisticsUpdate | |
Quizzes - Adding Existing Questions to a QuizThis tutorial walks you through adding existing questions (from a category) to a quiz.
| |||||||||||||||||||||||||||
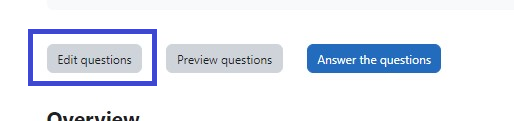
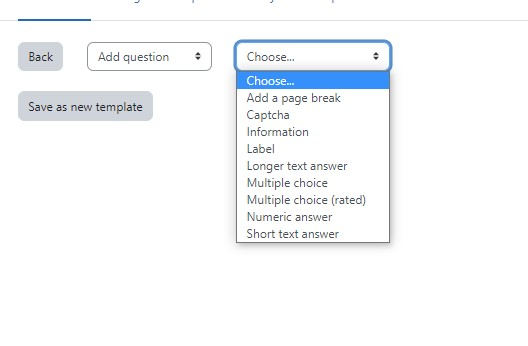
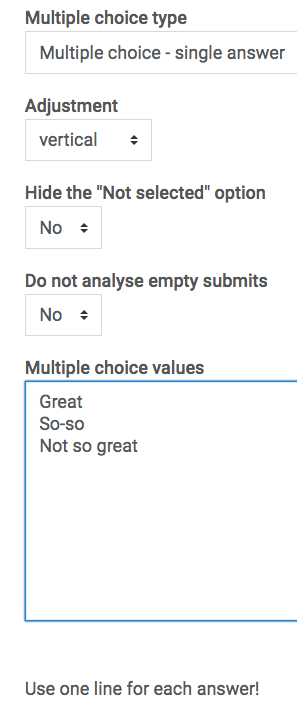
Quizzes - Adding QuestionsThis tutorial walks you through adding questions to a quizzes. A video tutorial can be found here: Adding Questions to a Quiz
| |||||||||||||||||||||||||||||||||
Quizzes - Copying from One Course to AnotherThe process for copying content from one course to another in Moodle is called "import." To copy content from one course to another, you will need to start in the destination course (where you wish the quiz to appear). For a video tutorial, click here.
Questions? Please submit a Help Ticket to SCC E-Learning (under "Select Type of Help," choose "Moodle Assistance") | ||||||||||||||||||
Quizzes - Create using Word or Text FilesFollow this tutorial on the Moodle site for uploading quizzes using different formats: Importing Questions with Text and Word Files | |
Quizzes - Deleting (Clearing) AttemptsIf you need to allow a student to re-take a quiz, you may need to clear the student's first attempt (depending on the settings of the quiz). A video tutorial can be found here: Clearing a Student's Attempt.
| |||||||||||||||
Quizzes - EditingThis tutorial will walk you through editing an existing quiz.
| ||||||||||||||||||||||||||||||||||||
Quizzes - GradingMost quiz questions are automatically graded by Moodle. This tutorial will show you how manually grade any questions not automatically graded by Moodle. A video tutorial can be found here: Manually Grading a Quiz
| ||||||||||||||||||
Quizzes - Managing Questions using CategoriesMoodle uses categories to organize questions for use throughout the course. Each time you create a quiz, Moodle also creates a question category. You can also create a categories. Any question in Moodle can be used in multiple places. Organizing those questions is essential to effectively finding and reusing them.
Questions? Please submit a Help Ticket to SCC E-Learning (under "Select Type of Help," choose "Moodle Assistance") | |||||||||||||||||||||||||||
Quizzes - Regrading QuestionsOccasionally, you will find that one of the questions on a quiz activity is incorrect or invalid. Follow the steps in this tutorial to adjust the problematic question and run a regrade for all (or selected) quiz attempts.
| |||||||||||||||||||||||||||
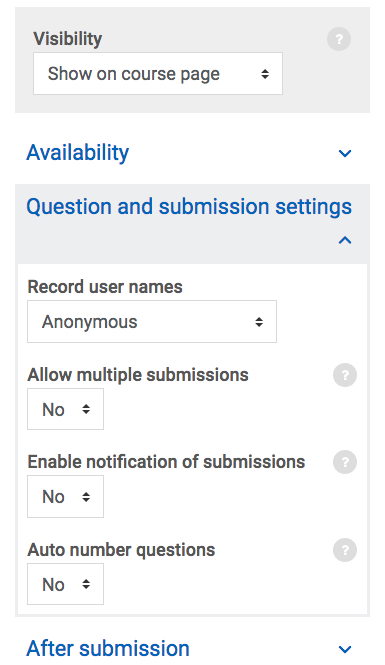
Quizzes - SettingsWhen creating a Quiz activity, you have many setting options. Below is a table that covers what each of the settings does.
| ||||||||||||||||||||||
Quizzes- PreviewingThis tutorial walks you through previewing a quiz. A video tutorial can be found here: Previewing a Quiz
| ||||||||||||||||||
R |
|---|
Recycle BinIf you accidentally delete an activity or resource, don't worry. You can restore any activities or resources that you accidentally delete. The course Recycle bin stores the activities and resources you deleted for 14 days before permanently deleting from the course.
| ||||||
Respondus - Enabling Proctoring for a Quiz or ExamRespondus LockDown Browser is a custom browser that locks down the testing environment within a learning management system. Important Note: If you do not see the Respondus block, contact E-Learning at elearning@southwesterncc.edu to have it added to your course. We highly recommend adding in a sample ungraded quiz requiring LockDown browser so students have an opportunity to test the software prior to a higher-stakes assessment.
| ||||||||||||||||||||||||
Restrict Access SettingsThe restrict access feature enables teachers to restrict the availability of any activity or even a course section according to certain conditions such as dates, grade obtained, group, or activity completion.
| |||||||||||||||||||||
Restricting AccessThe Restrict Access setting for activities and resources in Moodle allows you to limit access to resources based on various criteria. To set up restrictions, follow these steps:
| |||||||||
S |
|---|
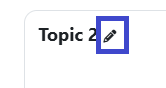
Sections or Topics - Adding NewThe Add a Topic option appears only at the bottom of your course.
| |||||||||


Sections or Topics - RenamingThe Add a Topic option appears only at the bottom of your course.
| ||||||
Self-Service - Preferred NameThis tutorial describes how to add a "preferred name" to your MySCC Self-Service profile. This name will appear in your Moodle profile and will be displayed instead of the name in the "first name" field. Note: please do not enter your last name.
| ||||||||||||
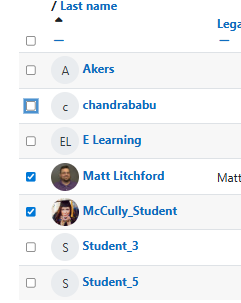
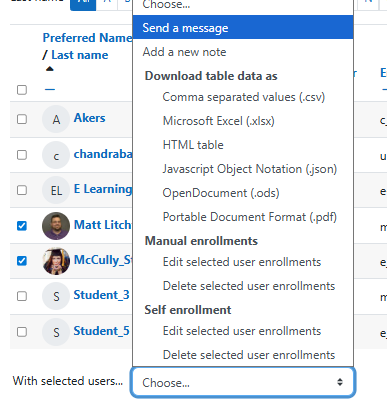
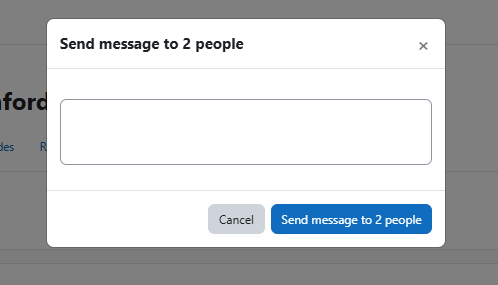
Sending Messages to Students via MoodleInstructors can send a group message to students via the Moodle messaging system. Messages will generate a notification in Moodle and an email that will go to students' SCC email accounts. Most of the time, putting in an announcement should be sufficient for communicating with your class; however, if you wish to message only specific groups of students, sending a message may be your preferred method. Be aware that you will not receive a copy of the message, so if you prefer to have a copy, you will want to email students from your SCC email instead.
| ||||||||||||

Syllabus - CopyingThis tutorial will walk you through how to make copy materials from one of your concourse syllabi to another. Begin the process by launching the link to your syllabus from Moodle.
| ||||||||||||||||||


Syllabus - EditingThis tutorial will walk you through how to make common edits in your concourse syllabus. Begin the process by launching the link to your syllabus from Moodle.
| ||||||||||||||||||


T |
|---|
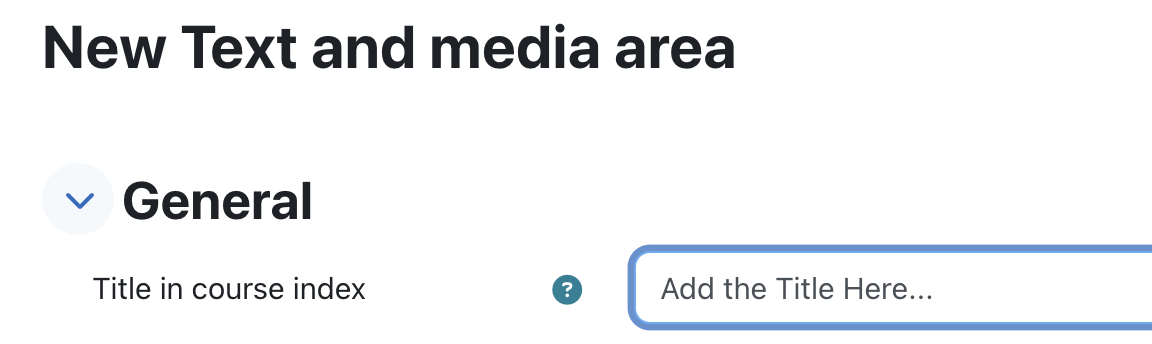
Text and Media Area (Resources)LabelA Text and Media Area serves as a spacer on a course page. It can be used to add text, images, or other items in between other resources. Text and Media Areas can help distinguish between and highlight different areas in a course. For a video tutorial, click here.
| |||||||||||||||


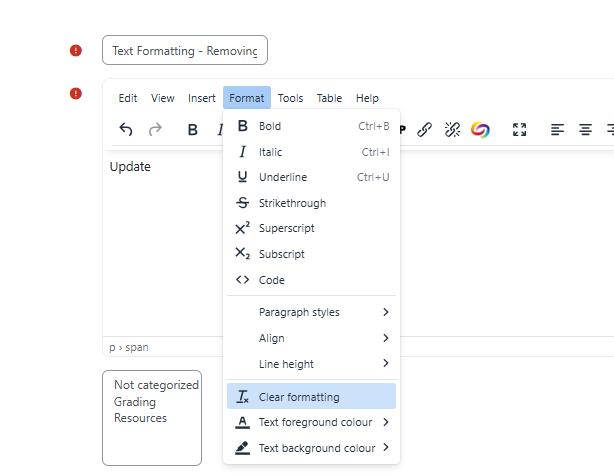
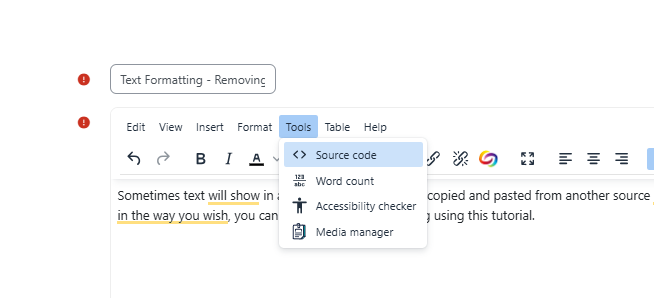
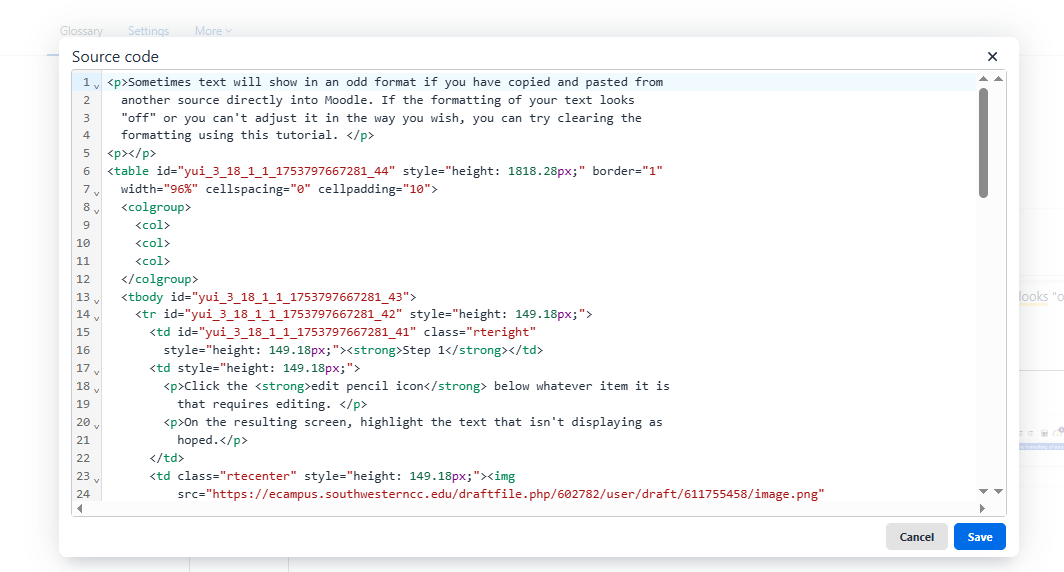
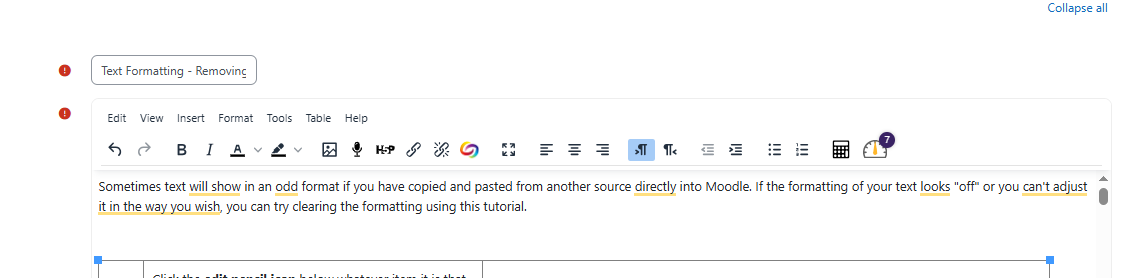
Text Formatting - RemovingSometimes text will show in an odd format if you have copied and pasted from another source directly into Moodle. If the formatting of your text looks "off" or you can't adjust it in the way you wish, you can try clearing the formatting using this tutorial.
| |||||||||||||||

Tutorial TemplateTitle Description
| |||||||||||||||
V |
|---|
Videos - Adding a Video Quiz to Your Course (Yuja)Adding quizzes to Yuja videos can help keep students engaged with your video content. Please note: You must have a Yuja video quiz already created to use this tutorial. For information on adding quizzes to your Yuja or YouTube videos, please see the Yuja Support Website.
| |||||||||||||||||||||


Videos (Yuja)This tutorial will show you how to add videos from Yuja to your Moodle course.
| |||||||||||||||||||||


Videos - Adding to Moodle Activities (Yuja)This tutorial shows you how to add a YouTube video to an assignment submission. Please note: To do this, your instructor must set the submission settings on the assignment to allow for a video submission.
| ||||||||||||||||||||||||


Videos - Recording (Yuja)Yuja offers a video creation experience, including the ability to record your screen.
| |||||||||||||||


Videos - Viewing Statistics (Yuja)In your Yuja Dashboard, you can view statistics for your videos as well as video quizzes.
| ||||||||||||


W |
|---|
Watermark or Aviso - Setting up a Watermark or Aviso Grade ItemMoodle and Watermark \ Aviso - Setting up a Grade ItemThe Aviso system sends grade notifications to students every 4 weeks. You must have grades in your Moodle gradebook in order for Aviso to function. If you are not using Moodle to collect assignments, begin by adding a Manual Grade Item to your gradebook where you can manually enter course grades. Every 4 weeks, enter student grades into that item in the gradebook. Please use the tutorials below to assist:
| ||||||||||||||||||||||||||||||


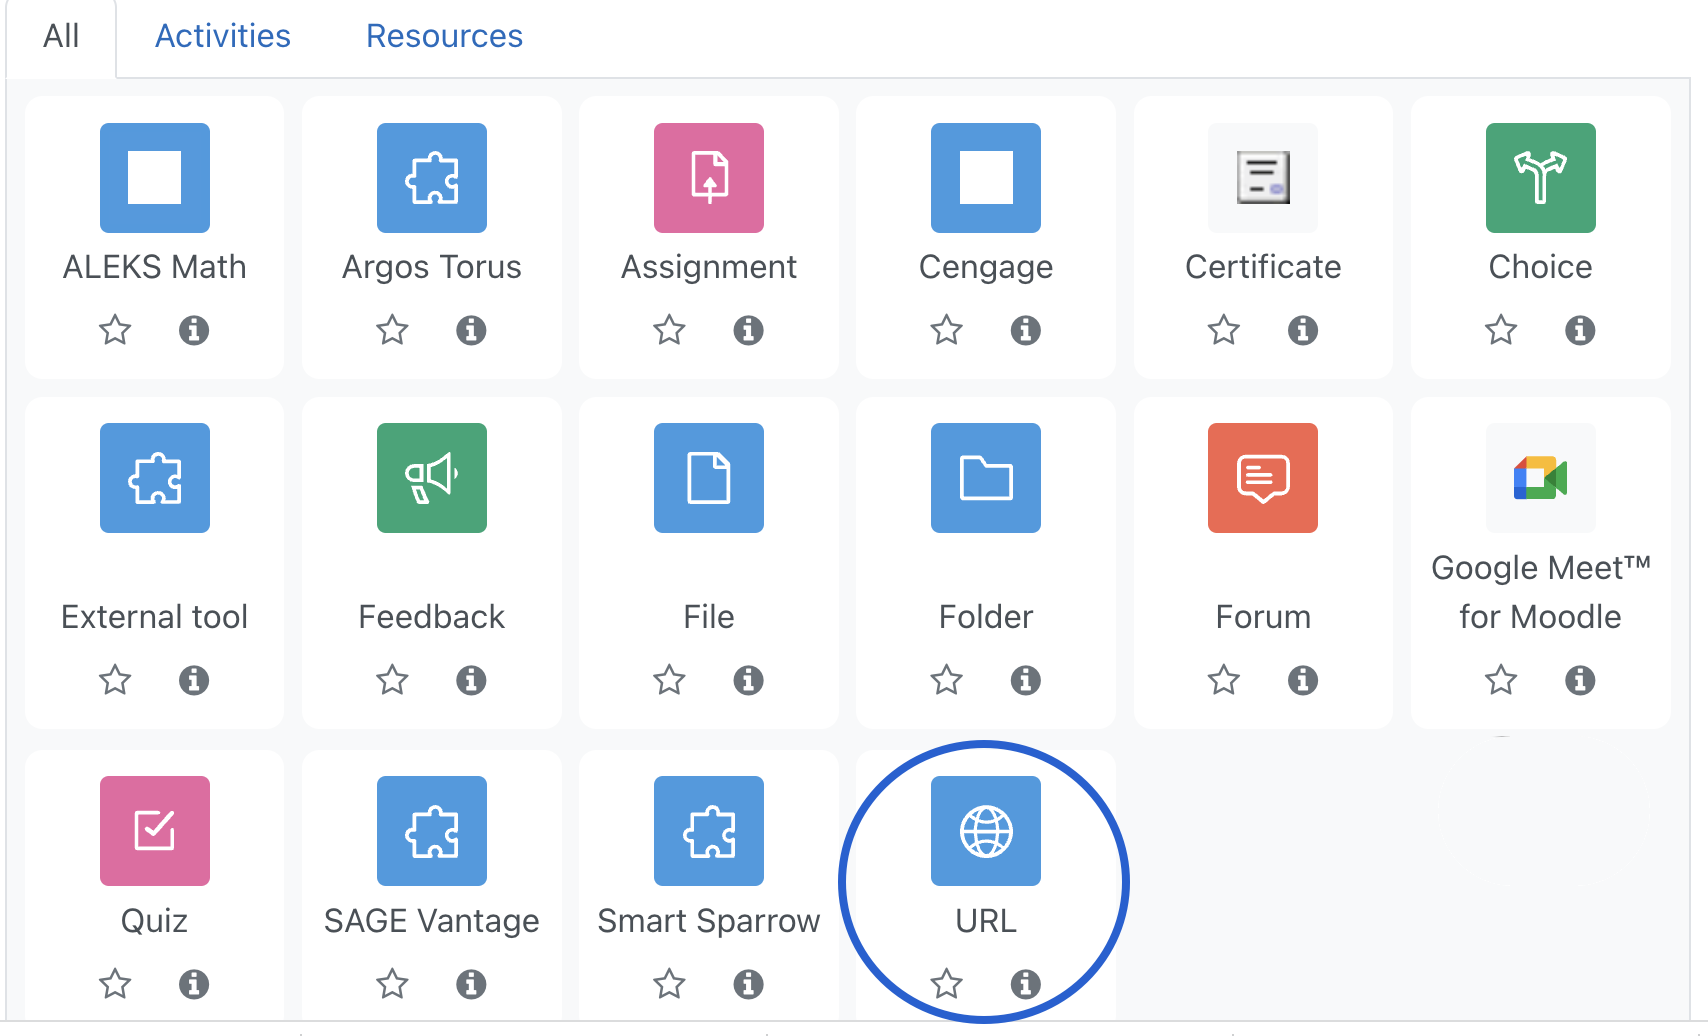
Web Links or URLsUse the URL resource to provide students with web links for research.
| |||||||||||||||