Browse the glossary using this index

A | B | C | D | E | F | G | H | I | J | K | L | M | N | O | P | Q | R | S | T | U | V | W | X | Y | Z | ALL

S

Matt Litchford

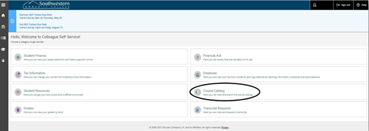
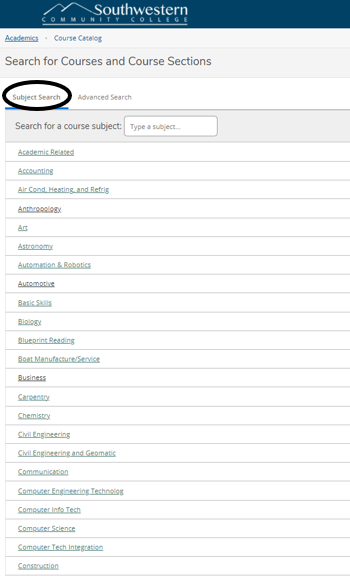
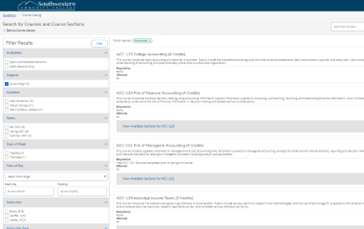
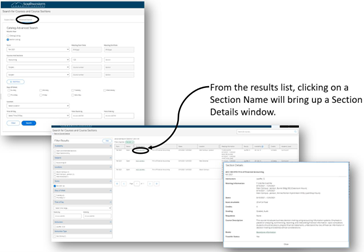
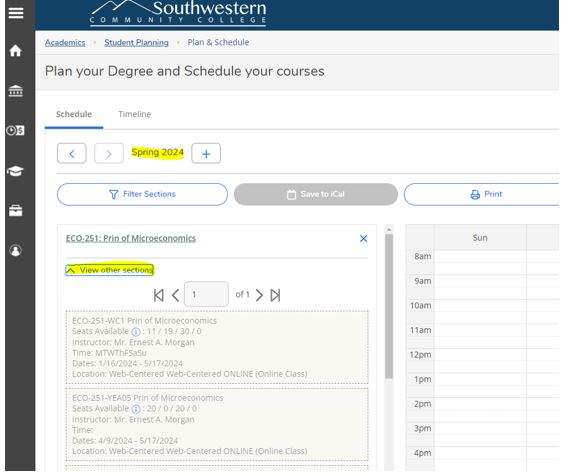
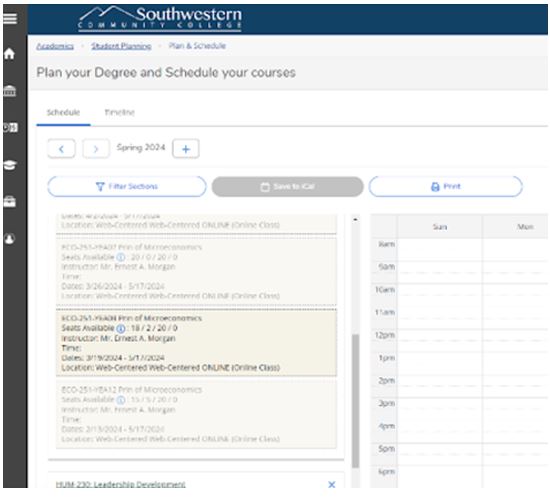
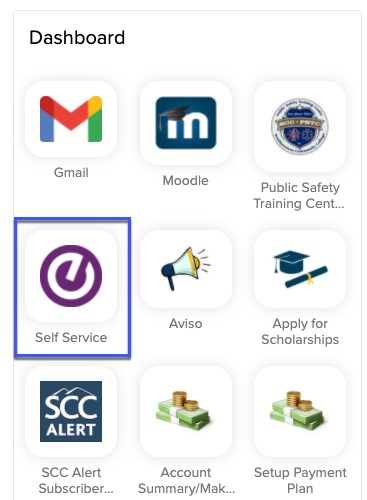
Self Service - How to Search for Available Courses

by Matt Litchford - Wednesday, June 25, 2025, 10:23 AM
 
How to Search for Available Courses

Step 1

From the MySCC Dashboard, select Self-Service

 Self Service Icon

Step 2

Select the Course Catalog section on your homepage.

 Course Catalog Highlighted in Blue


Step 3

You can use the Subject Search at the top left to look for courses within a specific program.

 Subject Search highlighted in blue


Step 4

Once a program is selected, courses can be filtered by semester, campus, days, times, etc.

 Search For Course screen example


Step 5

You can also use the Advanced Search option to find specific courses.


You can enter as much or as little information in your search as you wish.


Examples include Semester, Day(s) of class, Campus, or Time of Day.

 Search example results


Questions? Please submit a Help Ticket to SCC E-Learning (under "Select Type of Help," choose "Moodle Assistance")


Matt Litchford

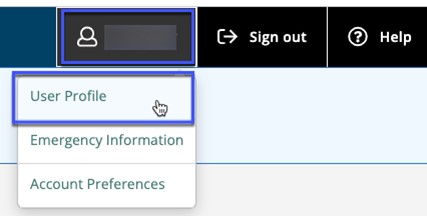
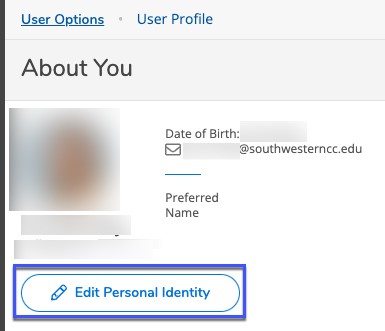
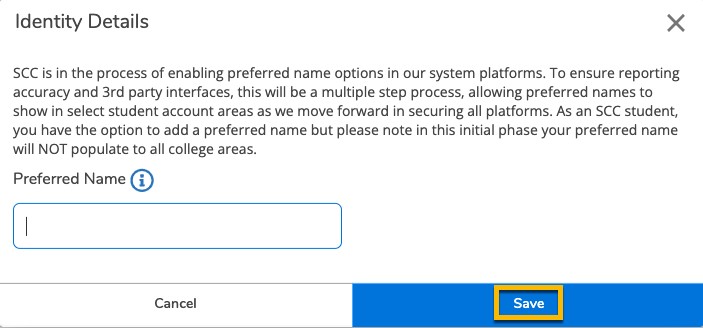
Self-Service - Adding a Preferred Name

by Matt Litchford - Wednesday, June 25, 2025, 10:25 AM
 
Messages in Watermark / Aviso can be sent as emails or text messages. 

Adding a Preferred Name

Step 1

Sign into MySCC.Click on Self-Service. 


Image of Self-Service icon

Step 2

On the resulting screen, click on your name on the upper right corner, then click on User Profile

Image of User Profile


Step 3

Click Edit Personal Identity


 Image of Edit Personal Identity


Step 4

In the pop up box, add your preferred first name, then click the Save button. Please do not enter your last name.
 
Your new preferred name will show in your Self-Service profile and will populate in Moodle, Aviso\Watermark and our Student Information database as well.


Image of Preferred Name


Questions? Please submit a Help Ticket to SCC E-Learning (under "Select Type of Help," choose "Moodle Assistance")


Matt Litchford

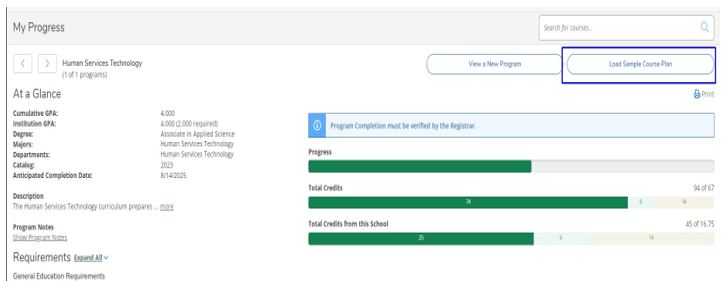
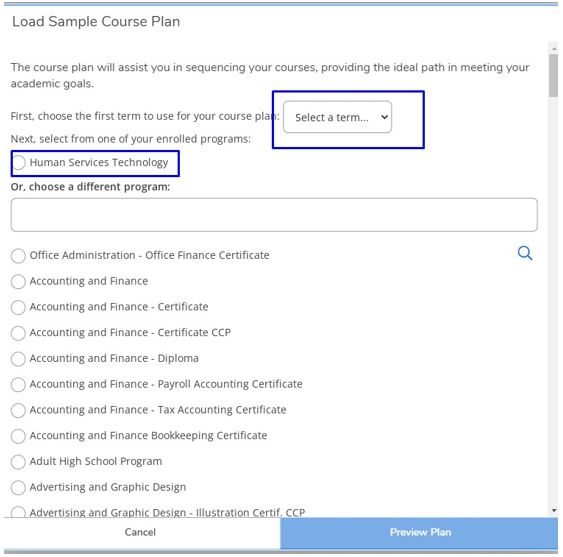
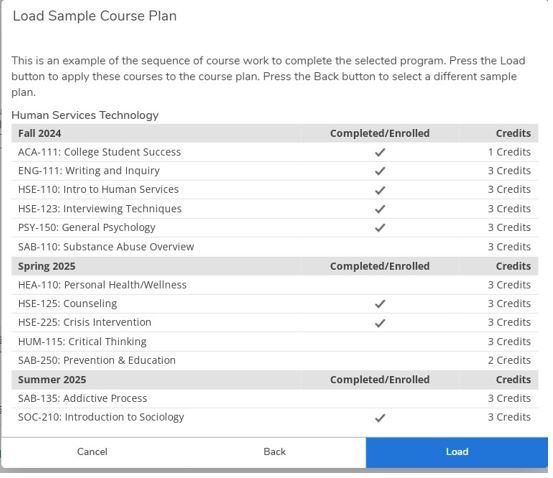
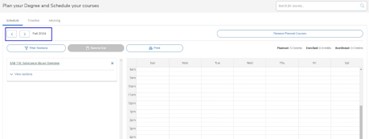
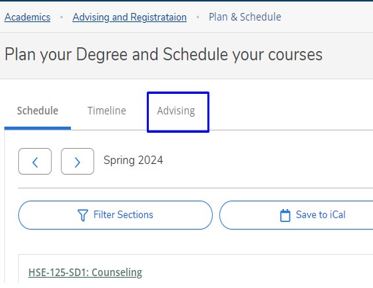
Self-Service - Creating an Academic Plan

by Matt Litchford - Wednesday, June 25, 2025, 10:27 AM
 
Creating an Academic Plan
Step 1

Sign in to my SCC with your username and password. If you encounter any issues logging in, contact SCC IT.

Image of my SCC login screen

Step 2

Click on Self-Service and select Advising and Registration from the home screen. 

Image of Advising and Registration selected

Step 3

At the top of the next page, select Plan Your Degree.

Image of Plan Your Degree and View Your Progress selected

Step 4 This next screen will show any current information and progress on your degree. To create a first or new academic plan, click Load Sample Course Plan

Image of Load Sample Course Plan

Step 5 A new form will pop up where you can select a term, your current program if any, or search for a new program. Once you’ve selected the term and program select Preview Plan.

Image of Select a term and Human Services Tech

Step 6 A sample course plan will be created showing suggested courses and terms, which course you’ve already completed or enrolled in, and suggestions for future terms. You can select Load to automatically plan for the selected semesters and beyond.

Image of sample course plan for Human Services

Step 7 If you select Load you will be brought to the Planning and Scheduling page where your plan will automatically add future courses that you can register for later. You can see future terms my moving between them with the arrow buttons.

Image of Planning and Scheduling page


Questions? Please submit a Help Ticket to SCC E-Learning (under "Select Type of Help," choose "Moodle Assistance")


Matt Litchford

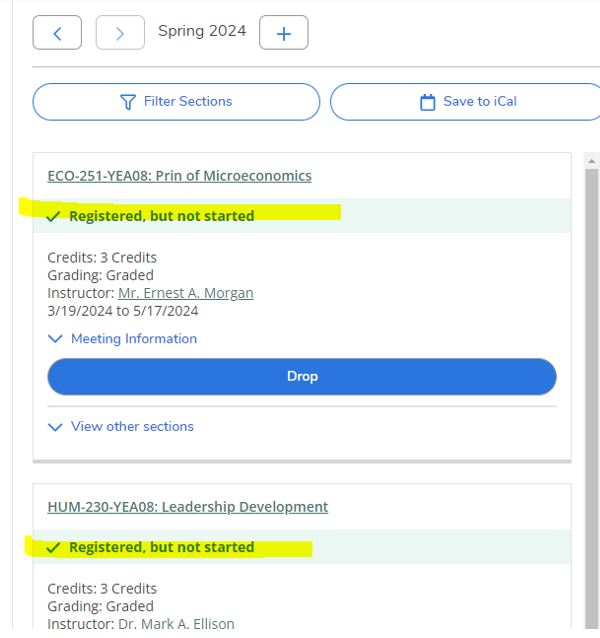
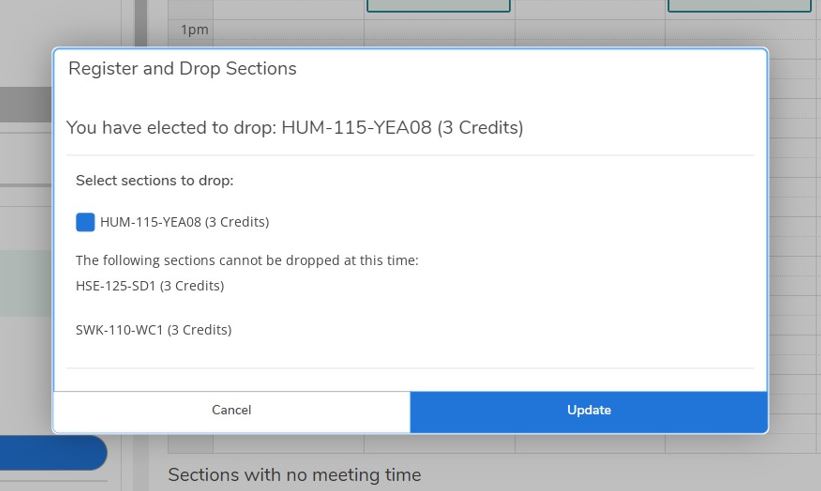
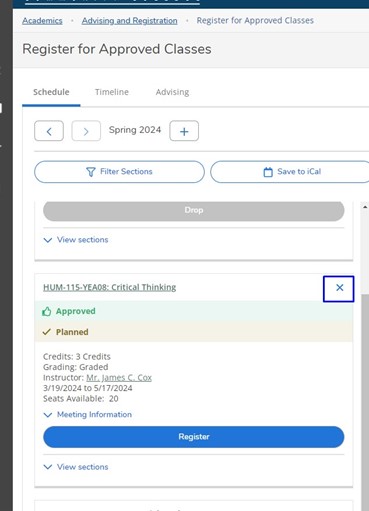
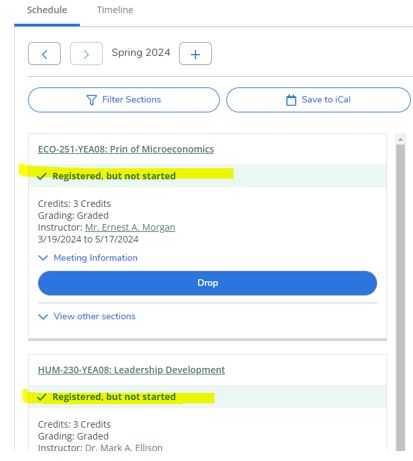
Self-Service - Deleting a Registered Class

by Matt Litchford - Wednesday, June 25, 2025, 10:30 AM
 
Deleting a Registered Class
Step 1

Sign in to my SCC with your username and password. If you encounter any issues logging in, contact SCC IT


Image of the mySCC login screen

Step 2  Open Self-Service

Image of Self-Service icon

Step 3 Click on the Graduation Cap (Academics) on the left-hand side of the screen. Then click on Register for Classes.

Image of Register for Classes circled in red"   title: Not specified

Step 4


Confirm that you are on the correct semester. If you are not, click the > button to move to the next semester.

Image of Spring 2004 and View other sections highlighted in yellow

Step 5 Locate the class you wish to delete and select the blue drop down button. 

Image of class sections

Step 6

A confirmation window will pop-up. Select Update to confirm the deletion of the class.

Note: Only classes that have not started yet can be deleted in this manner. 

Image of Register and Drop Sections

Step 7 The course will now show as planned but not registered. To remove it completely from your view select the X button to remove it completely from your plan.

Image of Register for Approved Classes and the X button


Questions? Please submit a Help Ticket to SCC E-Learning (under "Select Type of Help," choose "Moodle Assistance")


Matt Litchford

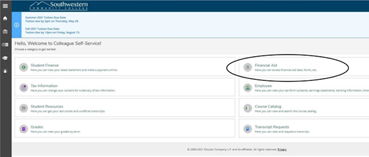
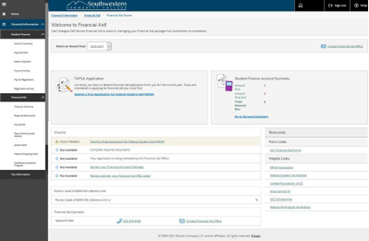
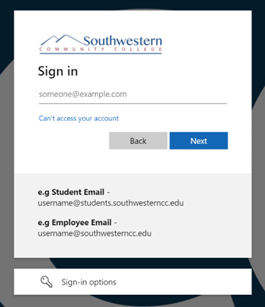
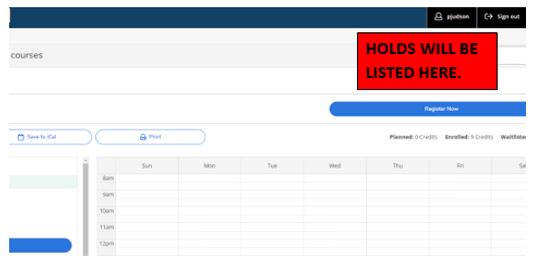
Self-Service - How to Find Your Financial Aid Page

by Matt Litchford - Wednesday, June 25, 2025, 10:31 AM
 
How to Find Your Financial Aid Page

Step 1

From the MySCC Dashboard, select the Self-Service icon.

 Self Service Icon

Step 2

Once in Self-Service select the Finacial Aid section on your homepage.

 Financial aid section highlighted in blue


Step 3

On the resulting page, you will find helpful information and links such as your FASFA application status, Account Summary, SCC Scholarships, Payment Plan, and Work Study Application.

 Example page of Financial Aid


Questions? Please submit a Help Ticket to SCC E-Learning (under "Select Type of Help," choose "Moodle Assistance")


Matt Litchford

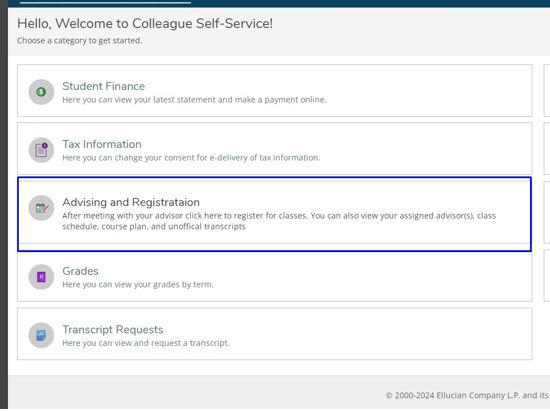
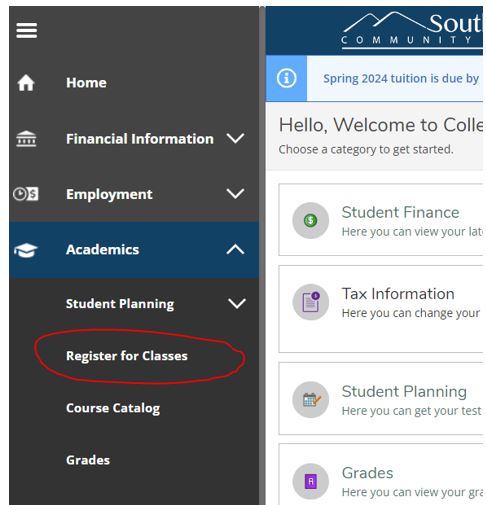
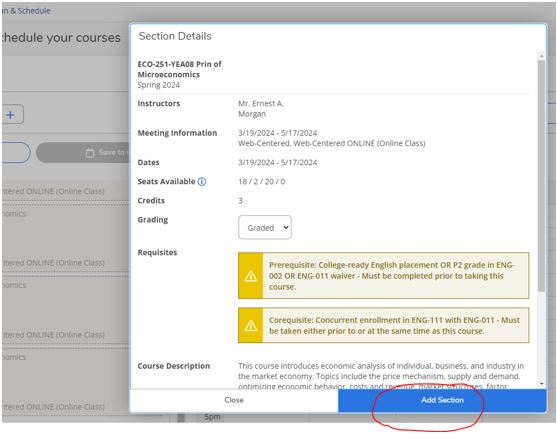
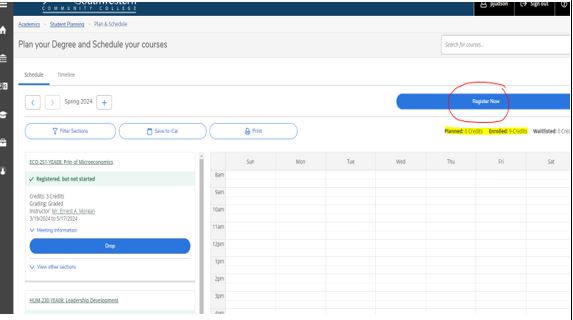
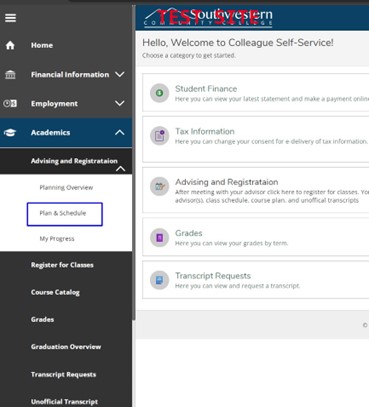
Self-Service - Registering for your SCC Courses using Self-Service

by Matt Litchford - Wednesday, June 25, 2025, 10:34 AM
 

Reminder: You must FIRST complete the advising process with your academic advisor.

Registering for your SCC Courses using Self-Service
Step 1

Sign in to my SCC with your username and password. If you encounter any issues logging in, contact SCC IT


Image of the mySCC login screen

Step 2 Go to Self-Service and click on the Graduation Cap (Academics) on the left-hand side of the screen. Then click on Register for Classes.

Image of Register for Classes circled in red"

Step 3


Confirm that you are on the correct semester. If you are not, click the > button to move to the next semester. Your classes will be listed on the left-hand side, and you will want to View other sections to view your options.

Image of Spring 2004 and View other sections highlighted in yellow

Step 4 Scroll down to view different sections for the class. When you find a section that works for you, click the box to open more information. 

Image class sections

Step 5 The pop-up box will give you more information about the time and location of the course. If it is the one you want, click Add Section.

Image of Add Section circled in red

Step 6 Once you’ve gone through your courses and added the sections you want, click Register Now. You should be able to see your “Planned” credits under the button, which will change to “Registered” once your registration has been processed.

Image showing the Register Now button

Step 7 Confirm that you can see your credits have moved from Planned to Enrolled. Scroll down the left side to see green text under each course saying “Registered, but not started” or “Registered."

Image of Registered, but not started highligted

Step 8 If there are any courses that you were unable to register for, please check the top of the screen for any holds you may have on your account (Business Office, Need Transcripts, Library Fine) and take care of these. If it does not look like there is a hold, but you were unable to register for one or more of your courses, contact your advisor to see what steps you will need to take next.

Image of HOLDS WILL BE LISTED HERE message"


Questions? Please submit a Help Ticket to SCC E-Learning (under "Select Type of Help," choose "Moodle Assistance")


Matt Litchford

Self-Service - Requesting a Review of an Academic Plan

by Matt Litchford - Wednesday, June 25, 2025, 10:36 AM
 
Requesting a Review of an Academic Plan
Step 1
Sign in to my SCC with your username and password. If you encounter any issues logging in, contact SCC IT

Image of mySCC login

Step 2

Click on Self-Service and you will be brought to the homepage. Select the three lines at the top left of the page to open the block drawer on the left. Select Plan & Schedule.

Image of Plan & Schedule section

Step 3

On the Plan Your Degree and Scheduling page, select Advising

Image of Advising selected

Step 4

On the Advising page at the right of the page, you can request a review of your current plan from your advisor. This will send your current plan and schedule to your advisor.

Image showing Request Review


Questions? Please submit a Help Ticket to SCC E-Learning (under "Select Type of Help," choose "Moodle Assistance")


Matt Litchford

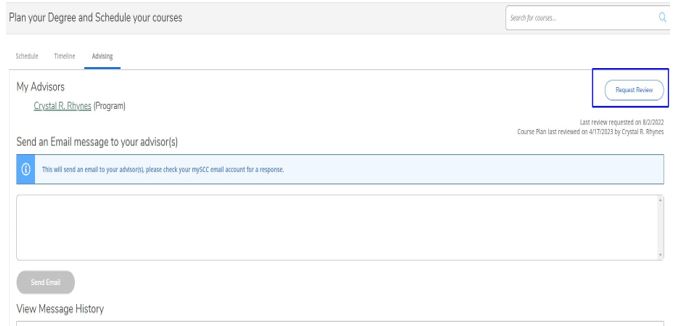
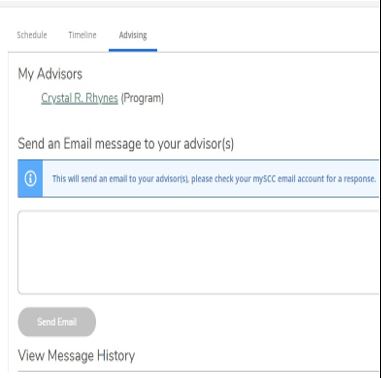
Self-Service - Sending a Message to Your Advisor

by Matt Litchford - Wednesday, June 25, 2025, 10:38 AM
 
Sending a Message to Your Advisor
Step 1
Sign in to my SCC with your username and password. If you encounter any issues logging in, contact SCC IT

Image of mySCC login

Step 2

Click on Self-Service and you will be brought to the homepage. Select the three lines at the top left of the page to open the block drawer on the left. Select Plan & Schedule.

Image of Plan & Schedule section

Step 3

On the Plan Your Degree and Scheduling page, select Advising

Image of Advising selected

Step 4

On this page, you can compose a message to your advisor as well as see a history of any previous messages sent in Self-Service.

Simply type your message and select Send Email when you are done. 

Image showing the Send an Email message to your school advisor(s)


Questions? Please submit a Help Ticket to SCC E-Learning (under "Select Type of Help," choose "Moodle Assistance")


Matt Litchford

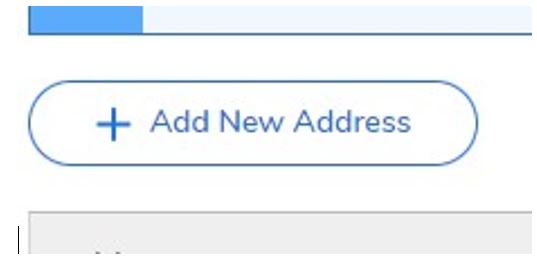
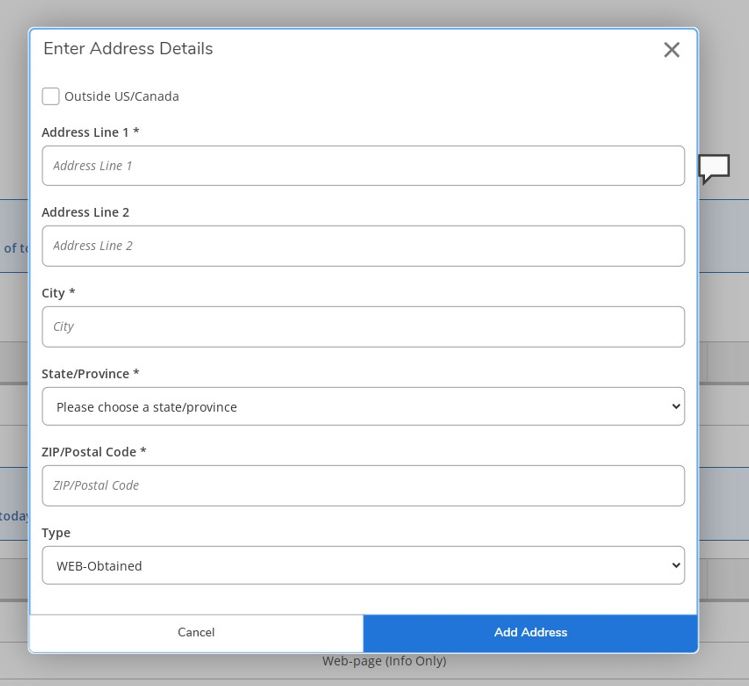
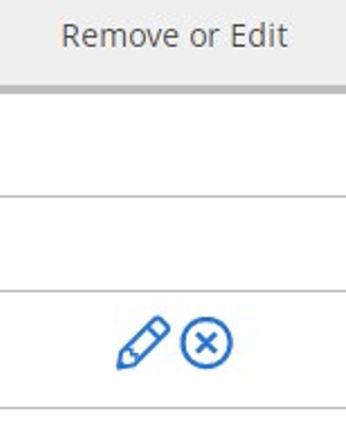
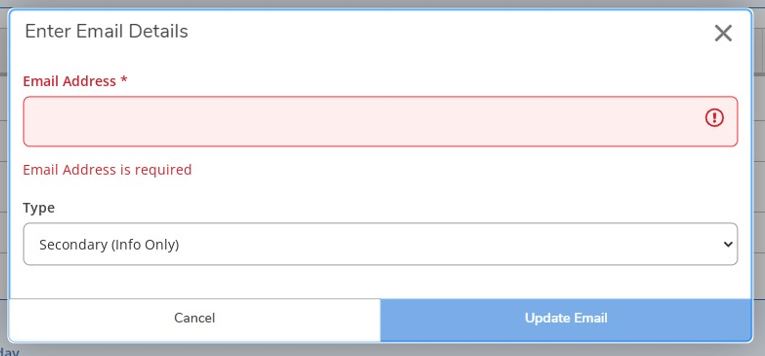
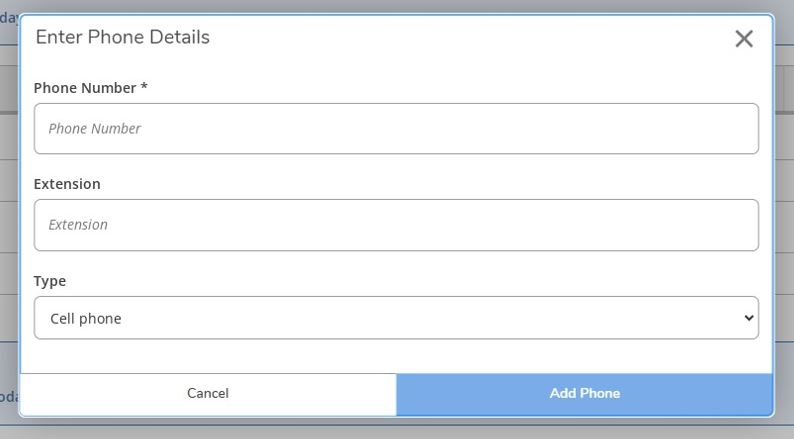
Self-Service - Updating Contact Information

by Matt Litchford - Wednesday, June 25, 2025, 10:41 AM
 
Updating Contact Information

Step 1

Sign into MySCC and select Self-service from the dashboard. 


Image of Self-Service icon

Step 2

On the Self-Service homepage select your user name at the top right of the page. Select User Profile from the drop-down menu. 

Image of User Profile


Step 3

To add a new mailing address, select Add New Address.


 Image of Add New Address


Step 4

On the pop-up window enter the necessary information and select Add Address.


Image of Enter Address Details and Add Addre

Step 5 

To edit your personal email address or phone number select the pencil icon next to your current entry.


"Image of Remove or Edit

Step 6

 
Once you’ve entered the information select Update Email to confirm the change.


Image of Enter Email Details and Update Email

Step 7 

To add a new phone number, select + Add New Phone.


Image of Add New Phone

Step 8 

On the pop-up window enter the necessary information and select Add Phone when completed.


Image of Enter Phone Details and Add Phone


Questions? Please submit a Help Ticket to SCC E-Learning (under "Select Type of Help," choose "Moodle Assistance")