Browse the glossary using this index

A | B | C | D | E | F | G | H | I | J | K | L | M | N | O | P | Q | R | S | T | U | V | W | X | Y | Z | ALL

Page:  1  2  (Next)
  ALL

C

Calendar - Adding Events

Adding Events to the Calendar in your Course

Assignments and quizzes with due dates will appear on the course calendar for users. However, instructors can also add calendar events for the course, which are visible to all users. Students can add User events, which are private and seen only by the user who created them.

Step 1

Navigate to the course in which you want to edit the calendar, and click on the tab that opens the Block Drawer on the right-hand side.

Step 2 Scroll down to find the Calendar and click on the Full Calendar link.  
Step 3 On the resulting screen, click the New event button.  
Step 4 Select Course for the type of event and enter the course number. Next, select Show More. The dialogue box will expand and you can enter the necessary information and dates.  
Step 5 Click Save.  
Step 6 You will now be able to navigate through the calendar to see the event you added.

For more information on the course calendar, click here.


Questions? Please submit a Help Ticket to SCC E-Learning (under "Select Type of Help," choose "Moodle Assistance")


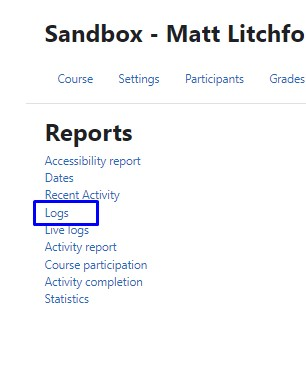
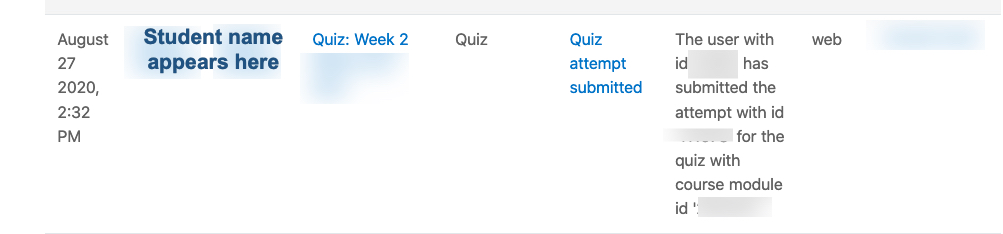
Census - Tracking Student Activity via Logs

Instructors may use logs to see the actions of students in their courses, even the previous activity of students who have dropped or withdrawn from the course.

Step 1 Begin by clicking on Reports at the top of your course.

Reports highlighted in Moodle naviation menu

Step 2 Select Logs on the resulting screen.


Reports menu with Logs highlighted in blue

Step 3 If you're looking for a specific student, use the dropdown menu to filter down to one student. You can update other parameters here with the other dropdown menus as well.

 Logs screen with available filter options

Step 4 Once you have the parameters set, click on Get these logs.

Log screen with available filter options. The Get these Logs button is highlighted blue

Step 5 As you scroll down, you will see the actions that the student has taken, including quiz attempts, viewing the course, open forum postings, and assignment submissions.

 Example log image


Questions? Please submit a Help Ticket to SCC E-Learning (under "Select Type of Help," choose "Moodle Assistance")


Changing the Read&Write Toolbar Settings


Changing the Read&Write Toolbar Settings


Changing the Read&Write Toolbar Settings


Changing the Read&Write Toolbar Settings


Changing the Read&Write Toolbar Settings


Choice

Choice

The choice activity module enables a teacher to ask a single question and offer a selection of possible responses. It's a good tool to get a simple response from students. For a video of this tutorial, click here.

 Step 1 Enable the Edit button at the top right of the screen.   
Step 1

At the bottom of the section where you want to add the choice, click Add an activity or resource.

image showing the Add an activity or resource link

Step 2 On the resulting screen, click Choice

image highlighting Choice in a blue circle

Step 2 Type a name for the Choice activity and an optional description.

image showing the Name and Description fields

Step 3 Below, choose the settings you want to use for the options.

For more information on settings, click here.

image showing sample options
 

Step 4 Fill in as many Option areas as needed with possible answers.

image showing sample Options with content

Step 5 On the bottom of the screen, set any more settings you wish.

image showing various available settings

Step 6 Click Save and return to course or Save and display.

For more information about the Choice activity, click here.

image of the Save and Return to course and Save and display buttons


Questions? Please submit a Help Ticket to SCC E-Learning (under "Select Type of Help," choose "Moodle Assistance")


Completion Tracking

Activity completion lets students know when they have a certain number of assignments to complete or items to view; this information is displayed underneath each section in the form of "Progress" information.

You must turn tracking on for your course to use activity completion. (For information on how to turn on course Completion Tracking, see this tutorial: Turning On Completion Tracking)

Step 1

Create or edit an existing activity or resource.

Step 2 On the left side in the settings area, expand Activity completion
Settings include:
  • Completion tracking: If enabled, activity completion is tracked, either manually or automatically, based on certain conditions. Multiple conditions may be set if desired. A check next to the activity name on the course page indicates that the activity is complete.
  • Require view: If enabled, the resource or activity is considered complete when a student views the resource.
  • Expect completed On: This setting specifies the date when the resource or activity is expected to be completed. The date is not shown to students and is only displayed in the activity completion report. Check this option to enable and set a date.

Once you have set the options, choose Save and return to course or Save and Display.

 
Step 3 Discussions have additional activity completion settings:
  • Require posts: Student must post discussions or replies.
  • Require discussions: Student must create a certain number of discussions before the forum is considered complete.
  • Require replies: Student must post a certain number of replies before the forum is considered complete.

Once you have set the options, choose Save and return to course or Save and display.

For more information, please see:

Activity Completion Tracking (Open LMS Documentation).

 
Step 4 When an activity has been set as required for activity completion, students will see a "To do" message in the activity with information about what must be done to receive the "done" designation.  
Step 5 When they have completed the activity, the message will change to "Done."  
Step 6 Want to see what students have successfully completed in your course? Click on the Reports and on the resulting page select Activity Completion  
Step 7 On the resulting screen, you'll see a table with student names and each of the activities in the columns, with green circles for any activities that were completed by the student and gray circles for those that have not yet been completed  


Questions? Please submit a Help Ticket to SCC E-Learning (under "Select Type of Help," choose "Moodle Assistance")


Concept

Definition


Page:  1  2  (Next)
  ALL


Accessibility

Background Colour Background Colour

Font Face Font Face

Font Kerning Font Kerning

Font Size Font Size

1

Image Visibility Image Visibility

Letter Spacing Letter Spacing

0

Line Height Line Height

1.2

Link Highlight Link Highlight

Text Colour Text Colour